Creating a Viewpoint | |||
| |||
-
From the Ambience Studio section of the action bar,
click Display Ambience Panel
 .
.
-
Click Create Viewpoint
 .
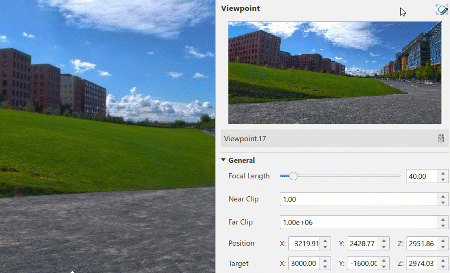
The created viewpoint is displayed in the preview and a new camera iteration is added to the list below.
.
The created viewpoint is displayed in the preview and a new camera iteration is added to the list below.
Some general and backplate parameters are now available to let you edit the new viewpoint.
-
Click
 to active
see-through mode.
In this mode, any changes you make to the properties are automatically visible in the 3D area.
to active
see-through mode.
In this mode, any changes you make to the properties are automatically visible in the 3D area.The viewpoint is updated accordingly.
-
To exit this mode, click again, or click
 in the immersive
tooltip displayed on top of the 3D area.
in the immersive
tooltip displayed on top of the 3D area.