Creating a Joint from Concept Surfaces | |||||
|
| ||||

-
From the Concept section of the action bar, click Joint
 .
.
-
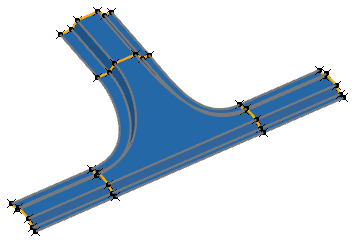
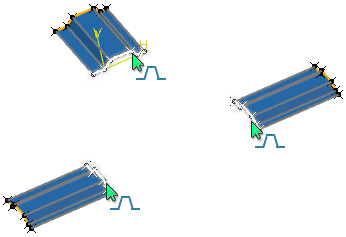
Select the inner end sections of the concept surfaces and click Finish in the Joint Creation Wizard.
A joint is created with three sections at the same position as the concept surface sections. The guide curves of the concept surfaces are also used for the joint. At this state, the joint has no Link Outputs and Face Outputs. Only a Joint.x element containing the sections is added to the tree.
-
Connect the section curves to create faces between them.
Tips: - Start to create the faces for which two section curves are connected.
- Hide the concept surfaces to make selection easier.
-
Select a section curve.

-
In the context toolbar, click Connect Section Domains
 , select the related curve of another joint section, and
Click Ok when finished
, select the related curve of another joint section, and
Click Ok when finished
 .
A face of the type Guided Loft
.
A face of the type Guided Loft is created.
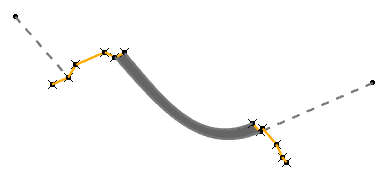
Tip: If the face is twisted, select the section curve and click Reverse Section Domain  in the context toolbar.
 -
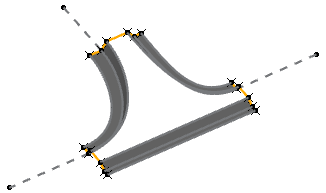
Connect all pairs of section curves in the same way.
-
Connect the three remaining section curves.
A face of the type Fill Surface
 is created.
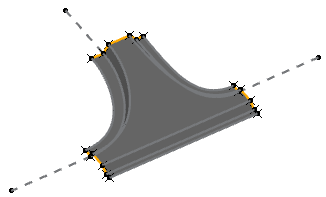
-
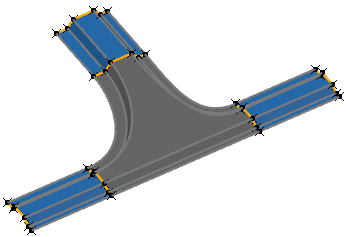
Set the concept surfaces to the Show mode to display the complete geometry.
- Optional:
Assign the layer assigned to the concept surfaces to the joint.
- Select the joint in the tree.
- In the Joint Properties section of the JOINT panel, select Assign Surface Layer in the context menu.
- Select a face of a concept surface to assign the same layer to the joint or another layer in the Properties → Layer module in the tree.