Workpieces Manager allows you to manage all workpieces
generated in the session.
Note that generated workpieces exist only in the current session—they are discarded when
the session is closed. However, workpieces can also be managed from within a Scenario of a
Manufacturing Simulation. In this case, persistency is available at the scenario level. This
means that you can define a different set of workpieces for each scenario.
-
From the Conveyor section of the action bar,
click Conveyor Network
 and select a
conveyor.
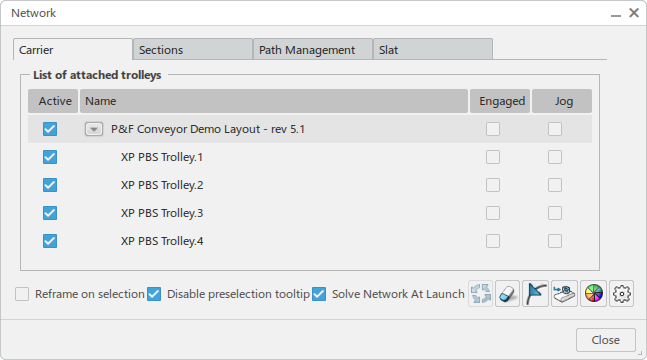
The
Network dialog box appears.
-
Click Workpiece Management
 .
.
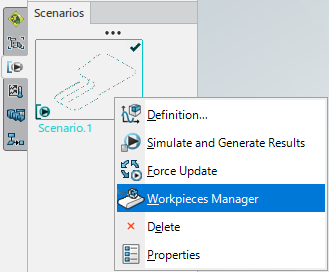
- If you are working from within a Manufacturing Simulation, you can also select
Workpieces Manager from the context menu of the current
Scenario.
The
Workpieces Manager dialog box appears.
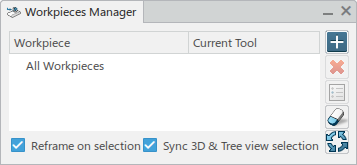
This dialog box provides the following functionality:
 |
Adds a manufacturing product to the Workpieces
Manager dialog box. It is used to create workpieces. |
 |
Removes a selected manufacturing product or a workpiece from the
Workpieces Manager dialog box. |
 |
Opens the Workpiece Attachments dialog box and
allows you to edit the attributes (mount ports, base ports) used to mount
the workpieces on tools. |
 |
Clears all selections in the tree view. |
 |
Updates all workpieces in the current session after mount and base
ports have been modified. |
When selected, Reframe on selection reframes the
viewpoint on all selections in the tree.
When Sync 3D & Tree
view selection is selected, clicking an object in the work area
results in the same object being selected the Workpiece tree,
and vice versa.
-
Click
 and select a
manufacturing product in the cell.
The
Workpiece Attachments dialog box for the selected
manufacturing product appears.
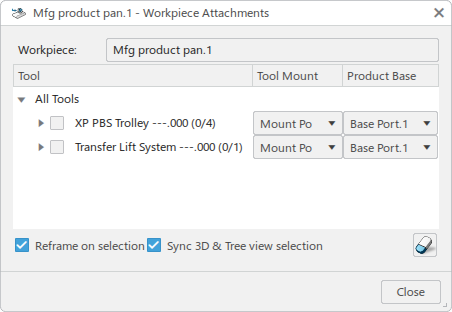
Workpiece displays the selected reference manufacturing
product.
The All Tools tree is grouped by tool
references. In-session instances are listed under each.
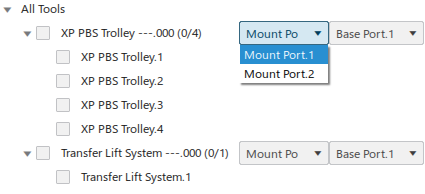
Note
that only tools that have mount ports defined are available for workpiece
attachment.
The tool Mount Ports and the manufacturing
product’s Base Ports are listed for each reference.
-
Select one or more tool instances.
As each tool instance is selected, the workpiece is displayed in the work area
and attached to the specified tool instance, with its base port snapped to the tool
mount port.
-
Select a port in the Tool Mount list to display it in the work area.
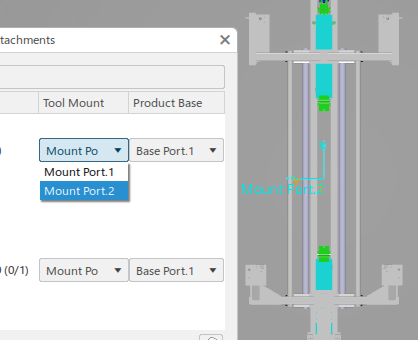
You can also select a port in the Product Base list to
display it.
-
Click Close.
All created workpieces are displayed in the Workpieces Manager
dialog box under the corresponding manufacturing product reference.
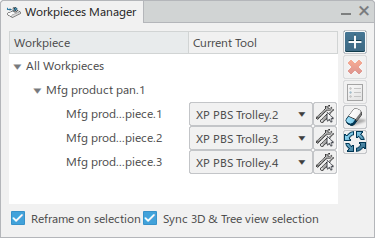
The
Current Tool list for each instance contains all possible tools
available for attachment. You can also click

to select a tool in
the
work area
on which the workpiece will be mounted. Selecting a different tool automatically
releases the workpiece from the current tool that attaches it and reattach it to the new
selection.
-
Close the Workpieces Manager dialog box when finished.