Export by an Interactive Function
You can export a model to Binary using an interactive function.
-
Open the
ExternalInterfaces library by searching for
it, see
Open with Search.
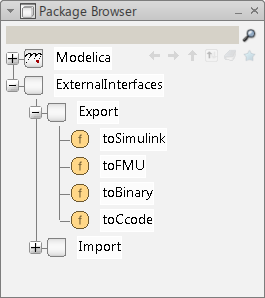
The ExternalInterfaces library is added to the list in the Package Browser.
-
From the
Package Browser select
ExternalInterfaces > Export.

-
To export to Binary, right-click
toBinary in the
tree
under
Export and then select
Call Function.
The ExternalInterfaces.Export.toBinary dialog box is displayed.
-
In the
Model name area of the dialog box:
-
Click
Edit
 .
The Select Model dialog box appears.
 - Select the model you want to export.
- Click OK.
The model name is added to the dialog box. -
Click
Edit
-
Optional: In the
Export directory you can specify a directory
to save the FMU directory, an example might be
"E:/Export".Notes:- The directory must be existing.
- Default is the working directory (cd).
-
Do one of the following:
- Click OK: The export function starts and when it has finished the dialog box closes.
- Click Info: A dialog box is displayed which gives a summary of the export parameters.
- Click Execute: The export function is started and when it has finished the dialog box remains open.
- Click Copy Call: The export function and its parameters are copied to the clipboard. You can then paste them into the scripting command window or into a script (.mos) file.
- Click Close: The export function is dismissed and the dialog box closes.
if you click OK or Execute:- A progress bar appears.
- The Message Reporting window appears to let you know the export result.
- If the export is successful, a number of files are created in the selected directory.
Note: The simulation run-time code added to the exported file dsmodel.c does not contain the most advanced routines from the binary link libraries. It is therefore, for example, not possible to export models with dynamic state selection.