Editing Class Attributes | ||||
|
| |||
- From the Package Browser, activate the class. In this scenario, activate Modelica.Mechanics.MultiBody.Examples.Elementary.DoublePendulum.
-
From the
Behavior Authoring section of the
action bar,
click
Class Attributes
 .
.
Tip: This command is also available from any of: - The
context menu
of a selected class, in the following browsers:
- Package Browser
- Preferred Classes Browser
- Proposed Classes Browser
- Classes for Force Elements browser
- The
Action Pad panel. To access the
Action Pad panel, from the
Tools section of the
action bar,
click
Action Pad
 , or right-click an empty area and select
Display > Action
Pad.
The Class Attributes dialog box appears and displays the attributes of the active class.If there is any description associated to the class, it is displayed in the Description box.
- The
context menu
of a selected class, in the following browsers:
-
If required, modify the class name in the Name box.
Note: If you change the name of a Modelica library, that is, you change the name of the root class of the library, the corresponding PLM reference and PLM representation reference names are also changed. For more information, see Creating a Modelica Library or Dymola Behavior Library.
Important: - In logical behaviors, you cannot rename neither PLMInterface, PLMConnectors nor the logical representation.
- Do not use the same name and version as a library already stored in the database.
- On the Class attributes tab, select a type from the Class Type box. For the purpose of this scenario, select Type.
-
From the
Extends area, click
Switch between class and basic type selection
 .
.
-
Select
Real as a basic type and click
Add.
Warning: The class type must inherit from a consistent basic type. For example, a Real basic type can be extended only by a Type class type. The Real basic type is added to the Class Path list in the Extends area.Important: To remove a basic type or a class from the Extends Class Path, click Remove. -
Optional: From the Properties area on the Class attributes
tab, you can select if the class is to be:
- Partial
- Protected
- Replaceable
- Encapsulated
- Optional:
Click
More to display the
Dynamic typing box.
Important: For short replaceable classes, a constraint can be specified. For other classes, this option does not appear. -
Select the
Graphical Preferences tab.
The options on this tab let you define the coordinate system properties of the diagram and the icon layers. The coordinate system is represented by a frame on both layers. Preserve aspect ratio and Initial scale are applied to components instantiated from a class.
-
Enter the minimum and maximum horizontal and vertical values for
both layers to define the frame.
Tips: - To see the frame of the diagram layer extent, click, from the
Diagram section of the action bar, the command Show
Diagram Extent
 .Notes:
- This option is by default not activated.
- The frame of the extent of the icon layer is always displayed.
- Applying this command
corresponds to changing the option Show
frame for diagram extent. To specify
this option, select
Me
 > Preferences > App Preferences > 3D Modeling > Systems Modeling and Execution > Dymola Behavior Modeling
, the
Editor tab, the
Component Visualization
group.
- You can also edit the coordinate system limits using the mouse. See Editing the Coordinate System Using the Mouse.
- To see the frame of the diagram layer extent, click, from the
Diagram section of the action bar, the command Show
Diagram Extent
- Select the Preserve aspect ratio check box to keep the aspect ratio when resizing a component in the diagram layer.
- In the Initial scale box, define the initial scale for a component.
-
Click OK to exit the Class
Attributes dialog box and save the new class attributes.
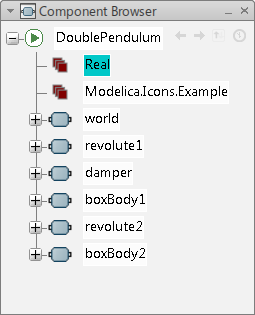
The new component appears in the Component Browser.
