Importing and Mounting Accessories and Adaptors

You can import and mount accessories and adaptors on a machine in one shot. You can also mount existing accessories and adaptors from the Resource Configuration View panel and mount and unmount accessories within a program.

An adaptor is a particular machine accessory with a base mount port and one or several tool mount ports (TMP). You can mount the tool adaptor on the tool mount port of a machine and mount a tool or tool assembly on the tool mount port of the adaptor.

This task shows you how to:

Import and Mount Accessories and Adaptors in One Shot

You can import and mount accessories and adaptors on a machine in one shot.

  1. From the Setup section of the action bar, click Mount and Import Resources .
  2. Optional: Click Import Accessory in the context toolbar.
  3. Enter a search criteria in the Top Bar.
  4. In the search results, select one or multiple accessories or a single adaptor.
  5. On the machine, select the workpiece mount port for the accessories, or the tool mount port for the adaptor.
    If the machine has a single workpiece mount port, this mount port is selected by default.

    If there is no base port defined in the manufacturing product, click Port Management to create a new axis system and define a port.

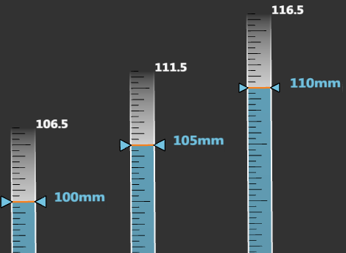
  6. Specify the offsets using the Robot. See Specifying Offsets Using Robot and Ruler.
  7. Double-click anywhere in the work area to mount the accessories or adaptor.

A verification is done to ensure that the accessory contains one base mount point. It verifies that the point does not have several mechanical ports of the type "base," and that it contains at least one workpiece mount point. If the accessory is not valid, a message appears:

  • Click Yes to open and fix the accessory in another tab.
  • Click No to cancel the current mount.
Notes:
  • For a mill-turn machine, a context toolbar appears on every spindle.
  • For other machines, a context toolbar appears on every resource that has a workpiece mount port.
  • A context toolbar is attached to every spindle or resource where you can mount an accessory. However, you can use the context toolbar of a given resource to mount an accessory on another resource.

Mount Accessories from the Resource Configuration View Panel

You can mount existing accessories and adaptors on a machine from the Resource Configuration View panel.

This task illustrates the mounting of accessories.

  1. In the Resource Configuration View panel, right-click a tool mount point and select Mount in the context menu.
  2. From the list that appears, select one or multiple accessories.
  3. Right-click the accessory and select Refresh Position in the context menu.
    The accessory snaps to the turret.
  4. Right-click the accessory and select Set Offset to adjust the position directly in the work area.


  5. Adjust the position of the offset using the Robot. See Specifying Offsets Using Robot and Ruler.
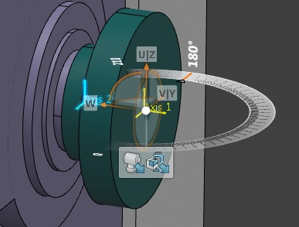
  6. Click the Robot and change the direction of mounting. The reversal is obtained by rotating the part/accessory along the arc by 180 degrees.
    The direction of mounting is changed.

  7. Use the Robot to define linear and angular offsets.

    Linear offsets are always calculated with respect to the mount-port axis system. Angular offsets can be provided using the robot-axis. Angles shown in the angular rulers have two distinct behaviors.

    • When only one angle is nonzero, the angular ruler shows the actual angle all the time during editing.
    • When there are more than one nonzero angles, the displays in the angular-rulers always start from zero for every edit.


    Note: The number of linear rulers displayed at any point of time depends on how many angles are modified and which linear modification is being done.
  8. Drag the mouse over the linear/angular scale during coarse stepping.
    Stepping depends on the position of the cursor over the scale. If the mouse is on the finer side of the scale, the stepping is finer and vice versa.

  9. Double-click anywhere in the work area to validate the position of the accessory.

Tip: Alternatively, you can mount an existing accessory or adaptor by clicking Mount and Import Resources from the Setup section of the action bar. Then, select the accessory or adaptor in the tree or work area.

Unmount an Accessory Within a Program

You can unmount an accessory within a program by creating an accessory change operation.

  1. In the Activities Process Tree, select an operation after which you want to unmount the accessory.
  2. From the Programming section of the action bar, click Accessory Change .
  3. In the Accessory Change dialog box, select Unmount from the Action Type list.
  4. In the Device list, select the accessory to unmount.

    Only activated accessories appear in the list.

  5. Click OK.

Mount an Accessory Within a Program

You can mount an already mounted accessory at another moment of the program by deactivating it and mounting it again. This is useful to avoid collisions between an accessory and a new tool.

  1. Deactivate the accessory as follows:
    1. From the Setup section of the action bar, click Mount and Import Resources .
    2. Select the accessory to deactivate.
    3. In the context toolbar, click Deactivate Accessory Configuration .
      The accessory is hidden. In the Activities Process Tree, the icon appears on the accessory, indicating the accessory is deactivated.
  2. Create an operation to mount the accessory again:
    1. In the Activities Process Tree, select an operation after which you want to mount the accessory.
    2. From the Programming section of the action bar, click Accessory Change .
    3. In the Accessory Change dialog box, select Mount from the Action Type list.
    4. In the Device list, select the accessory to mount again.

      Only deactivated accessories appear in the list.

    5. Click OK.