Viewing and Filtering the Part List | ||
| ||
-
Click
Show Part List
 from the
Auxiliary Viewer.
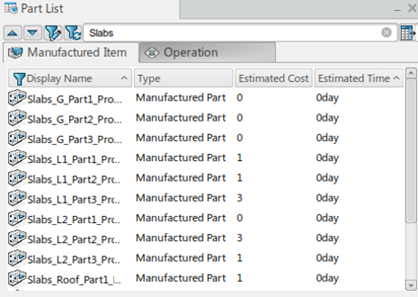
The Part List panel appears, and is populated with all the Manufactured Items and Manufactured Items or Operations.
-
Enter a term, example Slabs, in the dialog and click a
column header to filter.
Only those parts that match the entered term for the column selected are displayed in the list.
-
Enter a term in the dialog and Enter.
The list automatically filters based on the first column.

-
In the Product tab, right-click any manufactured
item.
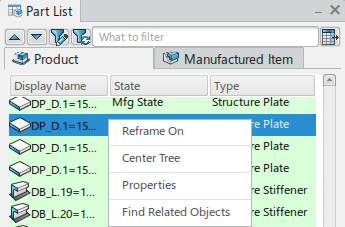
The Contextual Menu appears for a selection of menu options.- Reframe On - The view changes to the selected Product.
- Center Tree - Shows the location in the tree. See Center Tree.
- Properties - Shows the properties.
- Find Related Objects - See Finding Related Objects.
-
Click
Edit filter
 Select for your requirements.
 -
Click
Preferences
 The Product Selection dialog box appears.
- Select a Product.
-
Or click;
- Search Physical Product or Catalog
 .
. The text appears Select or search an object or Press ESC to exit. In Search select Catalog, and enter your catalog name or type catalog.

All of the catalogs appear in the search tab window.
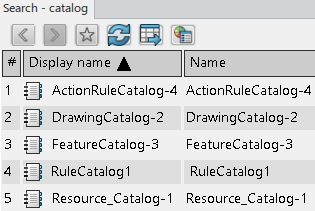
Double-click a catalog. An example, DrawingCatalog-2 opens the catalog.
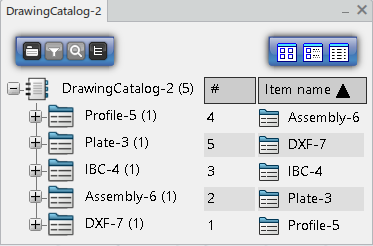
A Catalog is a tree structure consisting of the following elements:
- Chapters: A chapter references other chapters or items. Use to classify items by category.
- Items: An item is a reference to an external document or PLM Object. Items describe them with keyword values.
- Keywords: A keyword is an attribute describing a chapter or item. The Librarian can associate keywords to a chapter or item, and assign keyword values to each item. Search by keyword values to filter its content.
Libraries classify standard objects according to user-defined attributes. A Library consists of Classes, which categorize the objects in the Library hierarchy. Items are the actual objects that they manage.
Library to navigate, search, and select an item with better
view and performance.
Replaces the keyword in the catalog by an attribute in the Library and the filter updates accordingly.
- Search Physical Product or Catalog
-
Select the Digger Status.
This column is at the first index to show digger status and to manage Dig-in All and Dig-out All in Product and Item tabs.

Default - digger column displays the icon
 and each row displays the digger status of a
product or item. When clicking this column, it displays the
  icon then all products or items are
Dig-In status in the auxiliary viewer and the
rows display icon.
 When clicking the digger icons for assigned products in the Product tab, implementing items shows the Dig-In icon in the Item tab. It is the same for a vice versa case.

The digger functionality in the Part List interacts with existing hot keys – F7, F8, and F9. When Dig-In is executed by the F7 hot key, Dig-In parts show the icon.

-
Select a row in the Part list.
The corresponding object is prehighlight in the tree specification.
The row is preselected, editable cells display a blue triangle on the top-left corner. If the triangle of a cell is not seen, then this cell is not editable.

It also works when an unassigned product in the tree specification is prehighlight, a corresponding row in the Part List is preselected.
-
Add the Resulting Product Status column by using the
Customization dialog box.
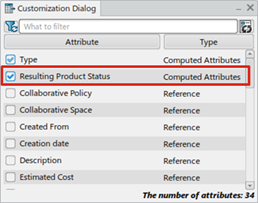
There are three different statues for the resulting product.
- Loaded: The resulting product of an item is loaded in the session.
- Not Loaded: The resulting product of an item is not loaded in the session.
- None: An item does not have the resulting product.
If there is change on the status of the resulting product, corresponding changes apply on Resulting Product Status of the Part List automatically.

