About Generate Operations by Catalog - Detail Behavior | ||
| ||
When Generate Operations by Catalog![]() is launched, there is 3 possibilities:
is launched, there is 3 possibilities:
- There is no scope link. The error message appears in the upper-right side of the window and it does not start.
- There is a scope link not specifying the catalog in PRM. The panel appears but you have to
choose the template from the database using the Catalog Browser so
that Compute is enabled.

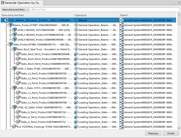
- There is a scope link and not specifying the catalog in PRM. The panel appears and the template shows in the line editor. Compute is enabled. After clicking Compute, it reads the rules with the template so that the second interface is shown.
Successfully retrieved operations are displayed in the Operation column but others are displayed as a Default. In the case of the system, successfully retrieved systems are displayed in the System column but others are displayed as the activated root system.
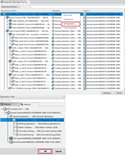
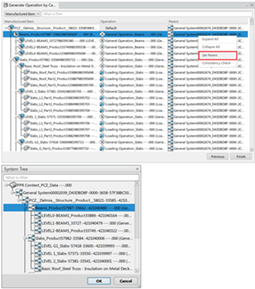
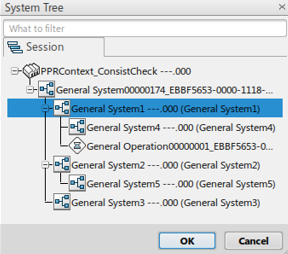
A general operation is created for Default type but there is an option to change it to a different operation in the template. Right-click a cell of an Operation column and click Set Operation in the context menu. Click this menu, an Operation Tree panel appears. Operation tree contains two tabs, from which the operation can be selected.
- Catalog tab: It contains operations from the catalog defined in PRM.
- Session tab: It contains operations from the current session.
Only one operation can be selected either from Catalog tab or Session tab. The selected one is displayed in the Operation column instead of the existing operation after clicking OK.
Differently, the Set Parent context menu is available for all Systems/Parents in Parent column. Right-click a cell of the Parent column and click this menu. Then a new dialog box only for Systems/Operations is in the template PPR context. Only one System/Operation can be selected and the selected one is displayed in the Parent column instead of the existing one after clicking OK.
During an update of the panel with selected Operation/System, the following confirmations perform for valid data creation:
- Aggregation Check: It confirms whether an operation generates
under parent or not.
- Aggregation check failed: If the aggregation
check has failed for an operation, then that operation is in a red
color, and an error message displays at the bottom of the panel.
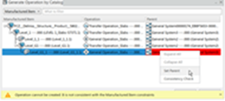
Here, as an example, the Sink System cannot be a parent of any operation. Aggregation Check fails here, hence the corresponding cell in the panel is displayed in red, and an error message displays at the bottom of the panel for 10 seconds. This error message can be corrected by reselecting another right operation or system from Operation Tree.
This error message goes away after 10 seconds or if you mouse-over on the non-RED cells. This message appears again if you mouse-over on the RED cell.
With this error operation, if Finish is clicked, the message box is displayed as below. This informs you about the failed confirmation. In the current example, since Aggregation Check has failed, the Aggregation Check Error displays. Do you want to proceed? If you want to proceed, operations are not set fo the respective Items.
Cancel, the command panel remains unchanged since no action is taken.
OK, no operation is generated for items for which Aggregation Check failed.
Below is the final result.
- Aggregation Check Succeed: If Aggregation Check is successful, the selected operation is displayed in the panel.
- Aggregation check failed: If the aggregation
check has failed for an operation, then that operation is in a red
color, and an error message displays at the bottom of the panel.
- Consistency Check: It confirms whether the operation generates
regarding the Consistency Check with an Item based on a predefined
rule. But, this command does not confirm the consistency between Item and System. Then the
Operation was created even if assigning Operation is inconsistent when Prevent
the creation of the inconsistent content option in Preferences is defined.For example, In the Item structure, the assembly sequence is as below.
Assembly.3, Assembly.2, Assembly.1 … And Product Flow creates from System.1 to System.2. But, the sequence of assembling Item and sequence of Product Flow for systems are inconsistent.
Here, Generate Operations by Catalog prevents creating the inconsistent object if the option Prevent the creation of inconsistent content in thetop bar Me/Preferences/All Preferences/System Editor tab is ON. An error message displays: Operation cannot be created: It is not consistent with the Item constraints.

- Consistency Check Failed: After computation, an error panel
appears if there is Consistency Check error. At this time, you
do not know which operation has a consistency problem. Because it takes long time to
verify consistency one by one. So the verification runs with all the contents during
the first computation, and then you can do detailed verification if there is error.
Do you want to identify which content is inconsistent? If you click OK,
it will take time.
OK , then the verification runs for each operation and the progress bar appears.
If the Consistency Check fails for an operation, then that parent is in a red color. And the error message displays at the bottom of the panel.
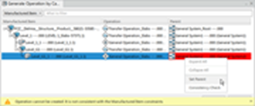
A Consistency Check menu is added in the context menu to verify consistency only for a selected item.
See also About Consistency Checks
Cancel, then Consistency Check starts manually by using the Consistency Check context menu on the Parent column.
Also, the consistency check is launched as soon as the parent object is changed by using the Set Parent context menu.
With this error operation, if Finish is clicked, a message is displayed, Do you want to proceed? Which informs you about the failed verification. In the current example, since the Consistency Check fails, the Consistency Check error displays.
Cancel, command panel remains unchanged since no action is taken.
OK, no operation generates for the item for which the Consistency Check fails.
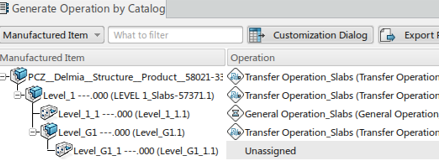
The operation that had an error does not generate.
To solve this Consistency Check error, change the parent object to the right one by using the Set Parent menu.
- Consistency Check Succeeded: If the consistency check succeeds for all contents, operations generate based on the computation result.
- Consistency Check Failed: After computation, an error panel
appears if there is Consistency Check error. At this time, you
do not know which operation has a consistency problem. Because it takes long time to
verify consistency one by one. So the verification runs with all the contents during
the first computation, and then you can do detailed verification if there is error.
Do you want to identify which content is inconsistent? If you click OK,
it will take time.
To generate these operations, click Finish. The progress bar is at the bottom with detailed information (percentage, operations) which generate and total operations to generate. In addition, interrupting the generation is available by pressing the ESC hot key when this finishes and undoes newly created operations.

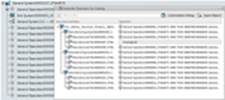
When the percentage of this generation reaches 100%, the result appears for newly created operations. New columns can be added by the Customization Dialog so that the values of PLM attributes are modified. And if you want to generate a report in either TXT or CSV or TSV formats, click Generate Report. Then the file extracts in a given path for the information in the tree view.
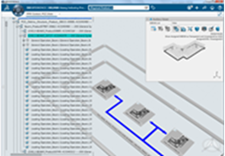
Created operation in the specification tree and auxiliary viewer updates according to the current display mode.
