-
From the top bar, select and navigate to .
-
Click the Custom Simulation Options tab.
-
In the Option Name column, double-click <ADD
OPTION>, enter a name, and press Enter to create a
custom option.
Repeat this step to create multiple custom simulation options.
-
Set the Default Value for each option that you have created.
Default Value specifies the default Boolean value of each
option.
- Select Default Value to specify a default value of True for
an option.
- Clear Default Value to specify a default value of False for
an option.
-
Click OK to close the Preferences dialog
box.
-
On the right side of the 3DEXPERIENCE
work area,
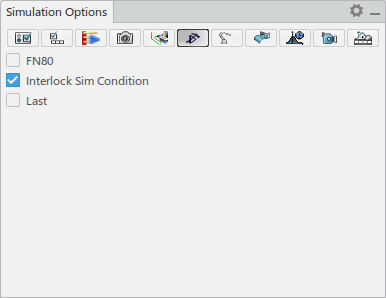
click Simulation Options
 . .
The Simulation Options panel appears. 
-
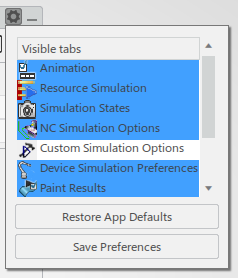
Click Show Preferences
 to reveal the
visible tabs available. Select Custom Simulation Options in the
list, followed by Save Preferences. to reveal the
visible tabs available. Select Custom Simulation Options in the
list, followed by Save Preferences.

The Custom Simulation Options
 tab appears in the Simulation Options panel, and is
populated with the options you have created.  Upon
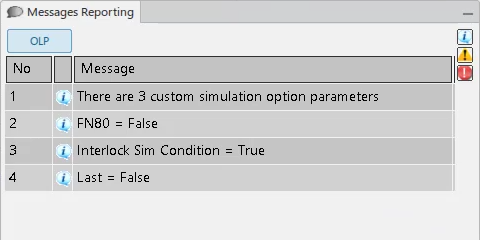
downloading a robot program with Create Robot Program, the custom
simulation options are indicated in the Messages Reporting panel.

-
The following sample code would be used to retrieve the value of a custom simulation
option (using FN80 as an example):
Dim Helper As OlpTranslatorHelperLA = CATIA.Application.GetSessionService("OlpTranslatorHelper")
Dim SimOptions as OlpSimulationOptions = Helper.SimulationOptions
Dim FNValue as Boolean = SimOptions.GetParameter("FN80")
|