-
From the Analysis & Output section of the action bar, click Create Robot Program
 . .
You are prompted to select a robot, motion group, or task.
-
Select a robot.
The Create Robot Program dialog box appears.
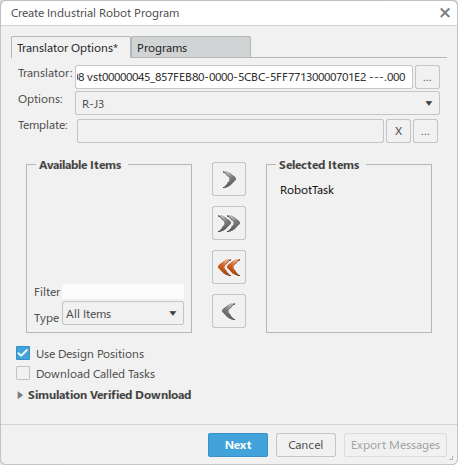
If the translator for the robot is in the database, it is automatically
selected.

- If a motion group was selected, all procedures for the main robot in that motion group are
displayed as available, including robot tasks, main procedures,
services, test procedures, and sub procedures.
- If a task was selected, all procedures owned by the robot that the task
belongs to are displayed in Available Tasks, and
the selected task is automatically included in Selected
Tasks to be downloaded.
- Optional:
Click Select Translator
 to choose a
different translator, if necessary. to choose a
different translator, if necessary.
You may want to select a different translator to:
- Use a different version of the current translator
- Use the XML translator
- Use a customized translator before updating your settings to use the
customized translator permanently
- Create or import a program for another robot manufacturer (useful when
replacing a robot)
The Applicative Search bar is highlighted, allowing you to
enter a search term for the required translator. 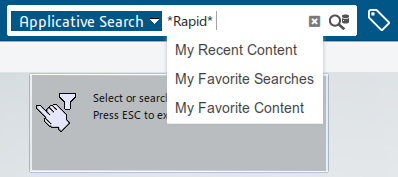 -
For some translators, an Options list also appears that
allows you to select a specific robot controller version:

In some cases the translation can be modified based on the robot controller
version used.
-
Click
 to select a
Template directory. to select a
Template directory.
If the current translator supports template download,
Template is available to select the template
directory that contains your template programs. The specific behavior for
how a template is used is translator-specific.
When a template directory is specified, the controller backup is used as a
template for generating the robot programs. Depending on the features and
controller type, the system variable and existing programs are used to
improve the generated programs. See Supported Translators for more information regarding template
support for the translator you are using.

You can click  to clear
the current selection. to clear
the current selection.
-
From the Available Items list, select robot programs to
download and click
 to move them to the Selected Items list. to move them to the Selected Items list.
Programs can be moved between Available Items and
Selected Items with the following commands:
 |
Moves selected items in the Available
Items list to the Selected
Items list. |
 |
Moves all of the items in the Available
Items list to the Selected
Items list. |
 |
Returns all of the items in the Selected
Items list to the Available
Items list. |
 |
Moves selected items in the Selected
Items list to the Available
Items list. |
-
Optional: Click Export Messasges to save any
generated messages as a text or Excel file.
Each message that appears in the Message Reporting panel
is output to the Excel or text file, and contains the same details.
Export Messasges is disabled until there are messages
available that can be exported.
The Export Log Files dialog box appears, prompting
you to enter a file name, location, and file type (*.txt or *.xls) to save.
Table 1. Excel messages file format
| No. |
Severity |
Message |
Object in App |
Line Number |
| 1 |
Notice |
The identifier RobotTask was changed to RobotTas to
conform with the naming rules. |
RobotTask |
|
| 2 |
Warning |
Invalid FANUC group number. The FANUC position P[1]uses
group number 2 but there are no corresponding devices in V6
to upload this target information. This Fanuc group will be
ignored. Based on the values of the parameters RailGroup,
ToolGroup, and WorkGroup here are the devices for each Fanuc
motion group. Fanuc motion group number 1 should have these
devices: R2000iB-165F.1 For a total of 6 joint(s). Fanuc
motion group number 2 is not used. Fanuc motion group number
3 is not used. Fanuc motion group number 4 is not used.
Fanuc motion group number 5 is not used. |
|
28 |
| 3 |
Error |
Unexpected error. |
|
|
-
Select the required download options.

When Use Design Positions is selected, tag and part locations are
moved to their nominal state.
- Leave this option cleared if you are, for example, downloading tags
that are attached to a positioner that is not controlled by the
robot, and the positioner needs to be rotated from its design
position into the welding position before downloading.
- Similarly, you would leave this option cleared if you are using
product buildup and the positions of the products are controlled by
the process plan.
Select Download Called Tasks to download any tasks that are called by
the selected task(s).
-
Select Simulation Verified Download to expand and view its
options.

- Select Enable to verify the download by the
simulating the task. You can then select the task to simulate.
- Select View to visualize the simulation of the
selected task.
- Select Use simulated turns And configs to use the
turns and configs from the simulation rather than those chosen during
Teach.
The selected task is simulated when you click Next. During simulation, the
following information is captured for each robot motion:
- The joint values for the robot
- The Cartesian position with turns and configs
- The profiles used (tool, object frame, accuracy, and motion)
- The locations of products that are used in the robot task. A product is
used if tags used in the robot task are attached to that part.
The values above are used in the downloaded program in place of the persisted
values.
-
Click Next.
The robot programs are generated and the Programs
tab appears: 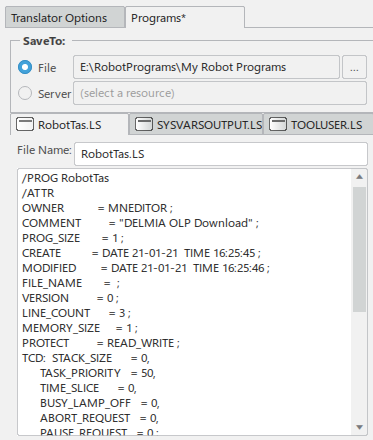 -
In the SaveTo: section, you can choose to save the
generated programs locally to a specified directory, or the server.
To save the programs locally, select File and click
 to select the
destination directory. The selected directory then appears in the dialog
box. to select the
destination directory. The selected directory then appears in the dialog
box.

To save the programs in the database, select Server
and select a resource (Manufacturing Cell, Robot, Tool, or Control Device).
The selection is then indicated in the dialog box.

If the files downloaded already exist in the zip file for the robot attached
to the resource selected, a warning message appears. You can use the
File Name: field to edit the names of the files.
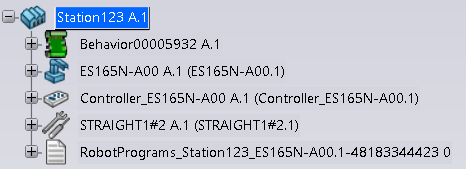
When you explore the resource, you can view the attached document that was
created during download.
-
Each generated program appears in a respective tab.
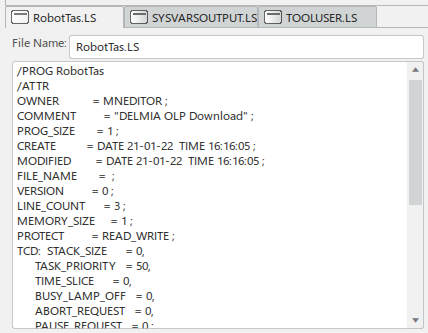
- NRL programs can be edited manually. All changes are saved.
- You can rename the file by editing File
Name:.
- Click OK to save the files and close the Create Robot Program dialog box.
|