Adding Zones | ||||||
|
| |||||
Add an Out Zone
Add a Product Zone
Add a Resource Zone
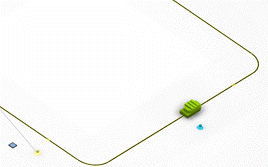
You can add a resource zone to specify a point in the product flow where a worker waits for a product.
-
From the Programming section of the action bar,
click Add Resource Zone
 .
.
The resource zone appears on the selected zone.
Tips:
|
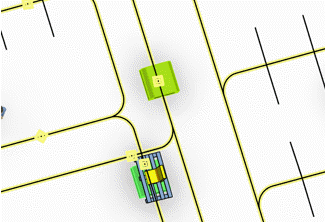
Define a Decision Zone on a Conveyor
You can define a zone on a conveyor where you want a resource to execute an activity on a product. You can define one decision zone per conveyor only.
-
From the Programming section of the action bar,
click Add Decision Zone
 .
.
-
Create an activity to handle the product:
- Select the decision zone.
-
In the context toolbar, click Add Transform Activity
 .
.
-
Click Add products to define the requirements for the Transform
activity
 and select an input product.
-
Click Add Products to define the output for the Transform
activity
 and select an output product.
- Press Esc.
-
To edit the activity parameters, select the zone and click Edit SLA
Resource
 .
.
The transform activity appears on the decision zone.
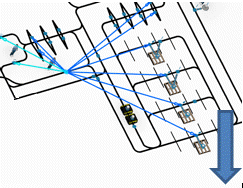
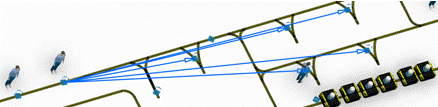
Create an AGV Decision Zone
You can create an AGV decision zone and add it to a pathway.
-
From the Programming section of the action bar,
click Add AGV Decision Zone
 .
Note: You can also add an AGV decision zone to a pathway in the Resource Configuration table.
.
Note: You can also add an AGV decision zone to a pathway in the Resource Configuration table. -
Click a pathway from the tree then click Resource Configuration
 .
.
-
To edit the AGV decision zone, right-click the zone and select Edit AGV
decision zone
 from the context menu.
You have edited the AGV decision zone.
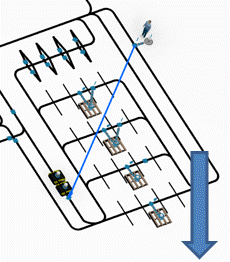
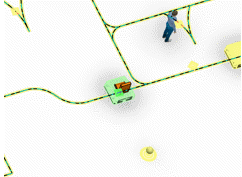
Define a Parking Group and Manage Mobile Objects
You can define a parking group and manage mobile objects for an AGV decision zone.
-
From the Programming section of the action bar,
click Parking Group Definition
 to define a parking group for an AGV decision zone.
-
In the Create or Edit AGV Parking Group dialog box that appears,
click Add Group
 ,
then select the AGV decision zone.
,
then select the AGV decision zone.
-
Click Edit Group
to edit a parking group and Remove Group(s)
 to delete a parking group.
-
Click OK to validate.
After completing the operation on the target decision zone, based on parking group definition, AGV routes to the parking decision zone if there are no other pending tasks.
-
From the Programming section of the action bar,
click Define mobile pre-emption
 to preempt the AGV moving to a parking task to perform a different task.
-
Set the preempting condition Activity Threshold value measured
by percentage, then click OK.
You have preempted the AGV moving to a parking task to perform a different task.
-
To define the depart requirement at the AGV decision zone, click Define
Mobile Depart Requirement
 from the Programming section of the action bar.
Note: AGVs must spend time at a decision zone even if the AGV does not have any operation defined at that decision zone. This occurs through the depart requirement for an AGV decision zone.
from the Programming section of the action bar.
Note: AGVs must spend time at a decision zone even if the AGV does not have any operation defined at that decision zone. This occurs through the depart requirement for an AGV decision zone.
Once you define depart requirement, all of the AGVs of the same pool that are passing
through that decision zone stop for the defined time and start to travel again. During
simulation, AGV is in Depart Blocked state when stopped at a
decision zone due to the depart requirement defined on the decision zone.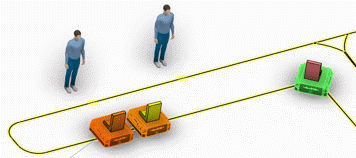
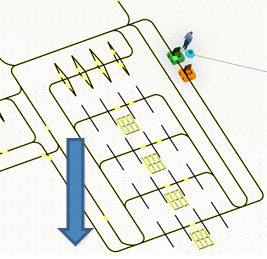
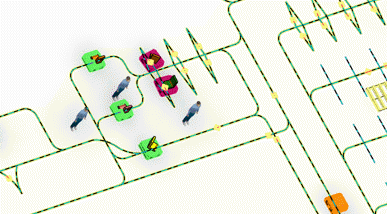
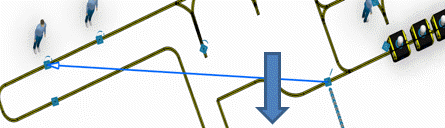
Define a Route Group on a Decision Zone
You can route group definition to a decision zone.
-
From the Programming section of the action bar,
click Route Group Definition
 , then select a decision zone.
Note: You can also route group definition to a pathway. In this case, the route groups already defined on the pathway are on the list.
, then select a decision zone.
Note: You can also route group definition to a pathway. In this case, the route groups already defined on the pathway are on the list. -
In the Create or Edit AGV Route Group dialog box that appears,
click Add Group
.
-
Specify the route group’s Product Status type to specify if
the group can be used for Light Rework or
Good parts.
Note: This does not support Heavy Rework.During simulation, AGV travels to the relevant destination based on the route group's product type. If the part is rework, the AGV is routes based on the route group defined for rework part. If the parts are good, then the part routes using the route group with the product type good.
-
Specify the Target Zones for the route group.
If there are multiple target zones, the target zone selection is based on what you defined as the Closest Free AGV in Route type. In this case, the AGV routes to the closest free AGV Decision Zone. Similarly, Farthest Free AGV is routed to the farthest free AGV Decision Zone and Cyclic AGV routes to each AGV decision zone in a cyclic manner.
-
Click Edit Group
to edit a route group and Remove Group(s)
to delete a route group.
You have routed group definition to a decision zone.
Note:
During simulation, when a group supplies a part to an AGV decision zone with a
defined load activity, it selects an AGV to perform the task.

Once the load activity occurs, based on route definition for given decision zone, AGV goes to the next decision zone.
Once the load activity occurs, based on route definition for given decision zone, AGV goes to the next decision zone.
If you defined a rejection rate on the decision zone, then inspection carries out
on the part during simulation and the part is good or rework.
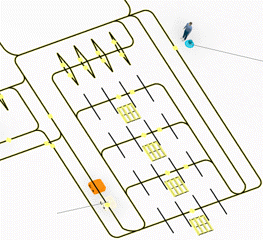
Define a Request Group for a Decision Zone
You can define a request group when you must pull a part from decision zone.
-
From the Programming section of the action bar,
click Request Group Definition
 , then select a decision zone with the Operation
mode set to Pull.
Note: You can also request group definition for a pathway. In this case, the request groups already defined on the pathway are on the list.
, then select a decision zone with the Operation
mode set to Pull.
Note: You can also request group definition for a pathway. In this case, the request groups already defined on the pathway are on the list. -
In the Create or Edit AGV Request Group dialog box that appears,
select the pathway then click Add Group
.
When you select a pathway, the list of all the request groups you defined appears.
-
Click Edit Group
to edit a request group and Remove Group(s)
to delete a request group.
You have requested group definition and pulled a part from the decision zone. Whenever you create a request on the resource connected to a decision zone operating on Pull mode, the request group fulfills the part request on the connected resource during simulation.
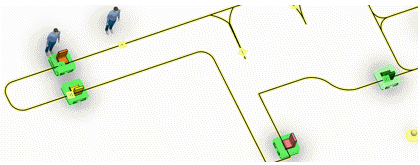
Define a Claim Group for a Decision Zone
You can define a claim group for a decision zone.
-
From the Programming section of the action bar,
click Claim Group definition
 , then select a decision zone.
Note: You can also claim group definition for a pathway. In this case, the claim groups already defined on the pathway are on the list.
, then select a decision zone.
Note: You can also claim group definition for a pathway. In this case, the claim groups already defined on the pathway are on the list. -
In the Create or Edit AGV Claim Group dialog box that appears,
click Add Group
.
- Optional:
Modify the request groups by using the Edit Group
and Remove Group(s)
options.
During Simulation, when two AGV come across an intersecting
path with a claim group defined, the first AGV claims a decision zone, which is part of
claim group. In this case, the other AGV waits in the previous decision zone in a claim
blocked state. 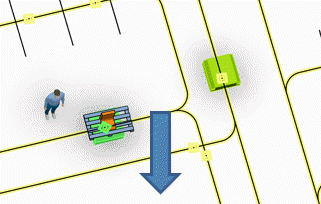

Once the First AGV unclaims the decision zone, which is part of the claim group, then the
claim blocked AGV starts moving.