|
Generate Operations
You can create Drill/Rivet operations from manufacturing patterns and tag groups.
-
From the Drill Fill section of the action bar, click Generate Robot Task
 . .
You are prompted to select a robot.
-
Select a robot in the work area or the tree.
If a robot task is selected instead of a robot, the rivet instructions are appended to the selected task. The Create Operations panel appears.
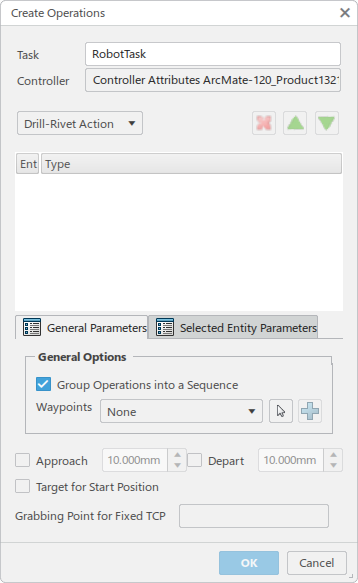 A default Task name is provided at the top of the panel. You can edit it. The Controller for the selected robot is also displayed.
-
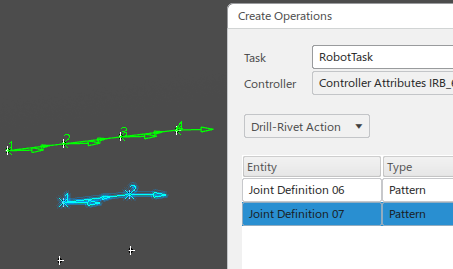
In the work area, select patterns to add to the Manufacturing Pattern list.
Each pattern appears in the list as it is selected.
Note:
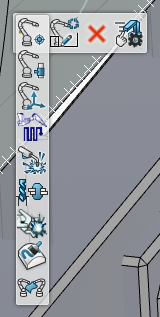
You can click  to remove patterns from the list, and click to remove patterns from the list, and click  and and  to move a pattern up or down. to move a pattern up or down.
- Click the General Parameters tab.
General Parameters are applicable to all the manufacturing patterns in the list. - Optional:
In the General Options section, select
Approach and Depart.
Approach and depart tags are created relative to the first and last point in the
approach and depart directions, at an offset distance defined in
. Robot motion instructions are created and associated to approach and
depart tags.
- Optional: Select Group Operations into a Sequence to aggregate the created operations into a single sequence.
-
You can use the Waypoints options to browse and select a
Waypoint Template, and to assign a Waypoint ID to each Drill-Rivet Action, as described
in Creating and Using Waypoints.
- Optional: In the Anvil Task Options section, select Create Anvil Task if you want to create an Anvil task.
-
Click in the Anvil Task text field and enter a name for
the Anvil task.
-
Select a robot in the work area that serves as the Anvil Robot.
-
Optional: Select a tag in a tag group that serves as the
Grabbing Point for Fixed TCP.
This option only appears in the Create Operations dialog box if the selected robot
has a remote TCP. It is used in scenarios where the product is not attached to the
robot, and the robot has to move to a specific location and grab the product.

When Grabbing Point for Fixed TCP is defined, the following
instructions are created upon clicking OK in the dialog box:
- A robot motion is created as the first instruction in the task to move the robot
to the grabbing point.
- A Grab instruction is created to grab the product.
- The Drill-Rivet Actions (or a Drill-Rivet Sequence) are created.
- A robot motion is created to move the robot back to the grabbing point.
- Click the Selected Entity Parameters tab, select a Tool Profile and Drill-Rivet profile.
These parameters are applicable to only the selected manufacturing patterns in the list. - Optional: If you have elected to create an Anvil Task, you can select the Rivet profile to be used for the Anvil robot. If no Rivet profile is available for the Anvil robot, a new Rivet profile with default parameters is created after clicking OK (Step 12).
- Optional: Select Optimize Cycle Time.
When selected, drill-rivet operations are sequenced in the task based on the spatial proximity of the points. - Click OK.
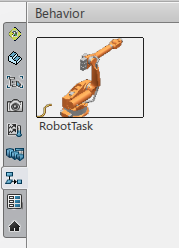
A new robot task appears in the Behavior side tab.
If Create Anvil Task was selected, Rivet Sequences/Operations are created in the Anvil Robot Task for the selected Manufacturing pattern.
Manage Operations with Teach
You can create, modify, and delete operations, actions, and sequences with the tools integrated into the Teach environment.
-
From the Programming section of the action bar, click Teach , or double-click a task in the Behavior side tab.
The Teach panel appears and lists the instructions of the selected task. If the selected task was generated from a manufacturing pattern with Group Operations into a sequence selected, a Drill Rivet Sequence appears along with other instructions. If not, the task generated contains Drill Rivet operations along with other instructions. A context toolbar also appears, providing commands for adding, modifying, and deleting operations, as well as access to Teach preferences.
Notes:
- The tags that are created when inserting a robot motion (Insert a Tag
Target) into the task are added to the active tag group. If no tag
group is active, a new tag group is created and tags are added to it.
- You can add a Drill/Rivet operation to a task by clicking Insert a Drill Operation and Insert a Rivet Operation in the context toolbar and selecting a manufacturing fastener. You can also modify the position of the manufacturing fastener associated with Drill Rivet operation, as well as delete a Drill/Rivet operation.
- Select a Drill-Rivet Action in the Teach table to highlight
the corresponding fastener in the work area.

- Drill/Rivet/Drill-Rivet sequences cannot be added or modified, but can be deleted. Deleting a
Drill/Rivet/Drill-Rivet sequence removes all instructions that it contains.
- A Drill/Rivet/Drill-Rivet sequence does not perform any motions, therefore motion parameters and
targets are not available for Drill/Rivet/Drill-Rivet sequences in the
Teach table.
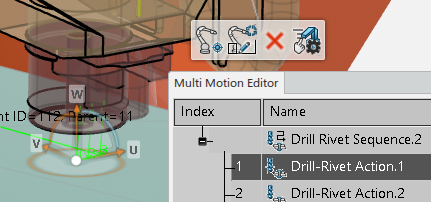
- Select a Drill/Rivet/Drill-Rivet sequence and click Expand the Multi Motion Sequence.
The Multi Motion Editor panel appears with the Drill/Rivet/Drill-Rivet sequence being root node.

The Target column in the Teach and Multi-Motion Editor tables for Drill-Rivet tasks displays Manufacturing Pattern and Manufacturing Fastener names instead of the cartesian position values that are normally shown. You can insert new robot motion instructions, modify the motion parameters of the instructions
and actions, and delete instructions from the sequence with the commands provided in
the context toolbar. You cannot insert new action instructions, but you can delete those that already
exist.
You can select a Drill-Rivet Action in the Multi Motion Editor
to highlight the corresponding fastener it in the work area.

-
Close the Multi Motion Editor panel, and double-click the sequence in the Teach panel.
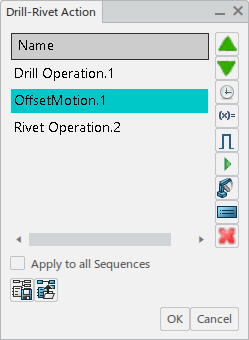
The Drill-Rivet Action panel appears.
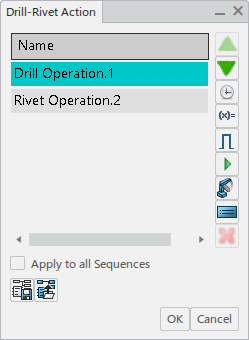
By default, actions contain the following instructions: - A Drill Action contains a Drill Operation
- A Rivet Action contains a Rivet Operation
- A Drill-Rivet Action contains a Drill Operation and a Rivet Operation
You can add the following instructions in the Drill-Rivet Action panel: Notes:
- You can double-click any instruction in the Drill-Rivet Action panel to access the editable properties of that instruction.
- Any modifications made in the Drill-Rivet Action panel are applied to all actions in the sequence.
- Tags created as a part of inserting a robot motion into a Drill/Rivet/Drill-Rivet sequence are
added to the active dressup tag group.
- Advanced logic instructions (If, Do-While, While-Do, For, Break, Return, Go To, And condition) are not available in Drill/Rivet/Drill-Rivet sequence.
- When a task or Drill-Rivet sequence is simulated using
Play from the Compass or the Compass player
 , all
instructions in the Drill-Rivet Action are simulated, as well as any robot
motions that occur after Drill/Rivet Operations. When a Drill-Rivet Action or
Drill-Rivet Sequence is selected in Teach, robot motions
that occur after Drill/Rivet Operation are not simulated. , all
instructions in the Drill-Rivet Action are simulated, as well as any robot
motions that occur after Drill/Rivet Operations. When a Drill-Rivet Action or
Drill-Rivet Sequence is selected in Teach, robot motions
that occur after Drill/Rivet Operation are not simulated.
- When a Drill-Rivet action is selected in either Teach
or the Multi Motion Editor, the Drill-Rivet action is
simulated. Upon completion, the robot TCP and compass return to the target
location (manufacturing fastener) in case the target location requires
modification.
- When a Drill-Rivet action contains robot motions after a Drill/Rivet
Operation, these robot motions are not simulated, as this would move the
robot TCP and compass away from the target location (manufacturing
fastener). This same behavior is also applicable when a Drill-Rivet Sequence
is selected in Teach.
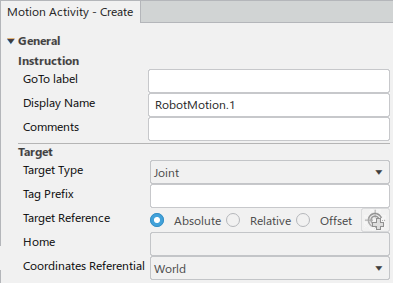
Inserting an Offset Move in the Action Editor
When you add an offset move in the Drill-Rivet Action editor, the robot moves by the
offset distance relative to the current target (manufacturing fastener) for each Drill-Rivet
action in the task or sequence.
Define an Offset for Manufacturing Fasteners
You can specify an orientation offset for a manufacturing fastener in the context
of a Drill-Rivet Sequence or Drill-Rivet Action.
-
With a task open within Teach, select a Drill-Rivet Action in the table.
The orientation Robot snaps to the corresponding manufacturing fastener.
-
Use the orientation Robot to specify the required orientation.
-
Click Modify
 to save the
position. to save the
position.
-
Select multiple Drill-Rivet Actions in the table.
-
Right-click and select Define Offset from the context menu.
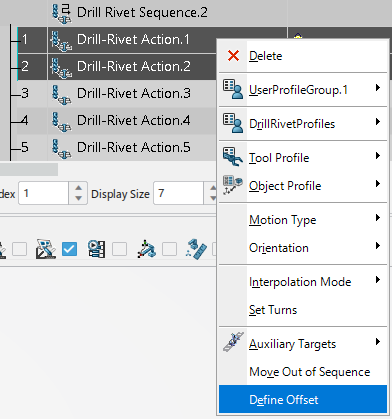 You can also
right-click a sequence and apply an offset to the entire sequence. 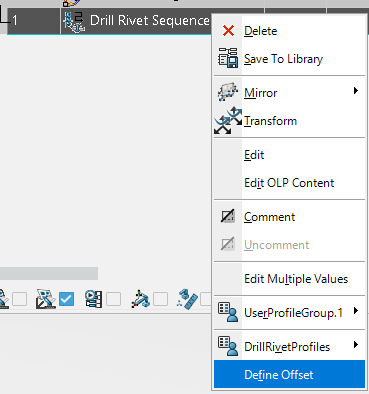 The
Define Manufacturing Fastener Offset dialog box
appears. 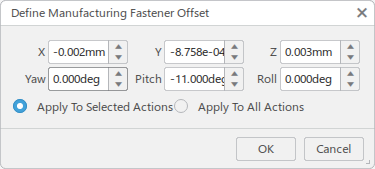 -
Specify the orientation offset and click OK.
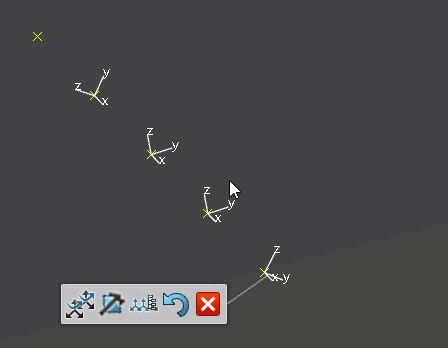
Interpolating Manufacturing Fasteners
You can interpolate the tag orientation of multiple tags for a smoother robot motion.
The command relies on two tags in a sequence having the correct orientation. By selecting
those two tags, all tags in between will have their orientation interpolated.
-
Click Manipulate Tags

-
Select a tag, tag group, or robot task.
The context toolbar appears.
-
Click Interpolate Tag Orientation
 in the
context toolbar. in the
context toolbar.
The Interpolate dialog box appears.
-
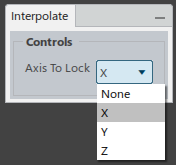
To restrict the interpolation to a specific axis, select it from Axis To
Lock.
-
Select the Begin Tag.
-
Select the End Tag.
The orientation of the tags between the selected Begin tag and End tag are
interpolated:
Note:
When a Compound Spot Trajectory is selected, Display
Sub Tree displays the Spot Weld Trajectory node for one of the welds
(typically the last node in the list).
-
Click Exit
 . .
You can select Reset Local or Last Changes
 to revert any
changes that have been made since Manipulate Tags was
started. to revert any
changes that have been made since Manipulate Tags was
started.
|
 > Preferences
. Robot motion instructions are created and associated to approach and
depart tags.
> Preferences
. Robot motion instructions are created and associated to approach and
depart tags.


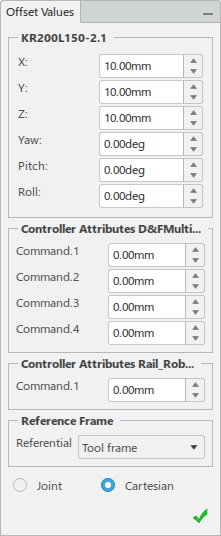
 to define the
offset values.
to define the
offset values.
 .
.
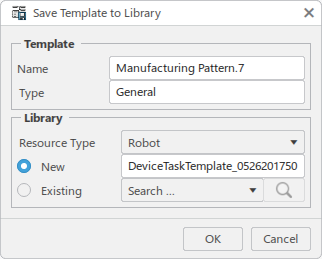
 to save
selected instructions as a template.
to save
selected instructions as a template.
 .
.