-
From the Conveyor section of the action bar, click Conveyor Network
 . . -
Click the required Power & Free Conveyor.
The Network panel appears, and the entire resource hierarchy is scanned to determine all conveyors, sections, attached trolleys, and branches.
- Optional:
From the Carrier tab, specify which trolleys in the List of attached trolleys are active, engaged or jogged.
When a trolley is engaged, it moves based on the dog spacing and disengagement distance even when not directly jogged. Multiple jog panels can be displayed simultaneously.
- Select the Branching tab.
All identified branches are displayed under List of section with multiple branching. - Optional: Select Display to show the control panel for each branch.
You can also click Show all branches or Hide all branches to affect the display globally. The Branching panel points to the start of the branch and lists all possible outgoing sections. Only one can be active at a time, and is indicated in green in the work area. All others are shown in red. Reframe upon selection allows you to focus on a desired trolley, branch or section. - Select the Sections tab.
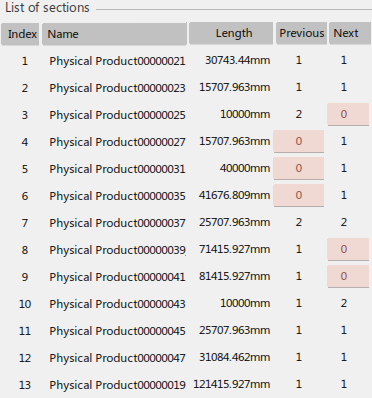
List of sections presents a list of all conveyor sections found in the session. The section name, length of the section, and number of previous and next connections are displayed. Select a section in the list to view its Extremities. In this scenario the Previous and Next track for some sections are not set up correctly.  - Click Section-Physical Product00000027.
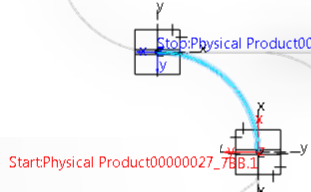
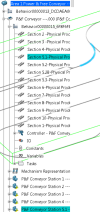
This highlights the section of track displaying the Start: and Stop:.  Since the Previous is not correct, close the dialog box. - Double-click Section 5.1-Physical Product00000027.
 The Section Properties dialog box appears. - Click Reverse Direction and close the dialog box.
- Click Conveyor Network
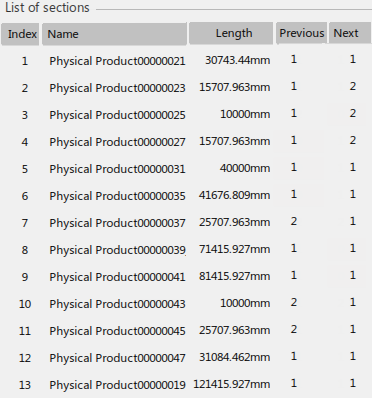
 . .The Section 5.1-Physical Product00000027 is correct. Follow the same steps to fix the rest. 
|