Using the Licensing Service Administration Web User Interface | ||
| ||
-
Click on the administration URL in the email, or open your browser and enter the URL to
connect to the web user interface:
Note: To know the browsers supported versions, see the Deployment | Strategic Platform Requirements | Browser Client Hardware & Software section of the Program Directory
https://customerID-eu1-licensing-3.3dexperience.3ds.com
where
customerIDis your customer identifier provided by Dassault Systèmes.The 3DPassport login page is displayed.
Enter your username and password, or create an account and log in using your account.
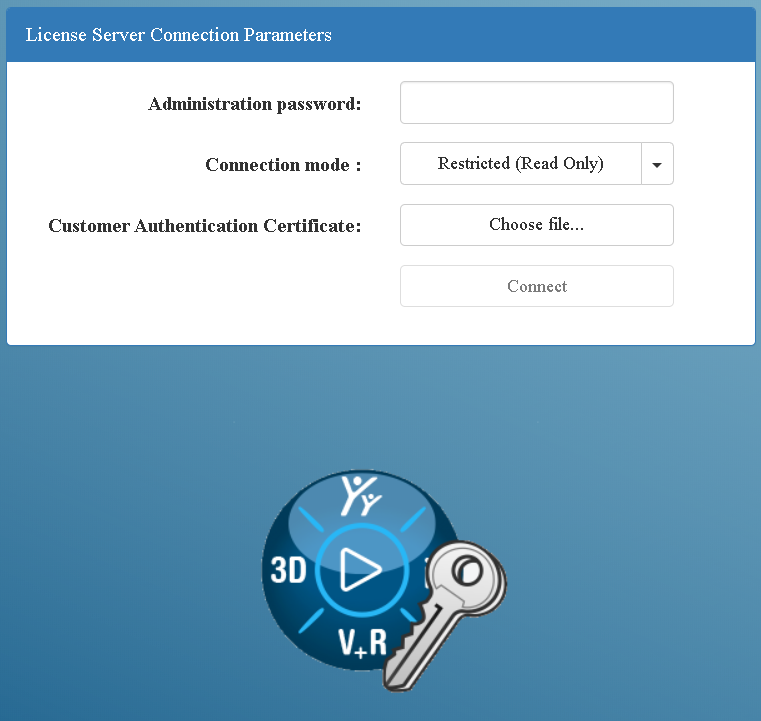
The License Server Connection Parameters page is displayed:

- Decide and enter the license server administration password.
For the moment, you have not set this password.
To access license server administration, a password is mandatory. The first time you use the license administration you must define passwords for both full and restricted accesses. If you lose the password, you must ask Dassault Systèmes to reset it. This action will reset all settings, such as passwords, e-mail configuration and authorization rules.
Note: To reduce the risk of license authentication file theft, and mitigate the consequences of any theft, we strongly recommend that you do not keep the passwords and the authentication file in the same place, and that you configure authorizations allowing only your Internet output IP (and not LAN IPs). - Specify the connection mode.
The connection mode can be:
- Restricted (Read Only)
- Full (Read/Write)
which are the same modes available when configuring the license server as described in Configuring and Activating a Standalone License Server.
When setting the password the very first time, both connection modes are allowed.
- Select the customer authentication certificate by clicking
Choose file....The customer authentication certificate is the authentication file sent to you in the email.
- Click Connect.
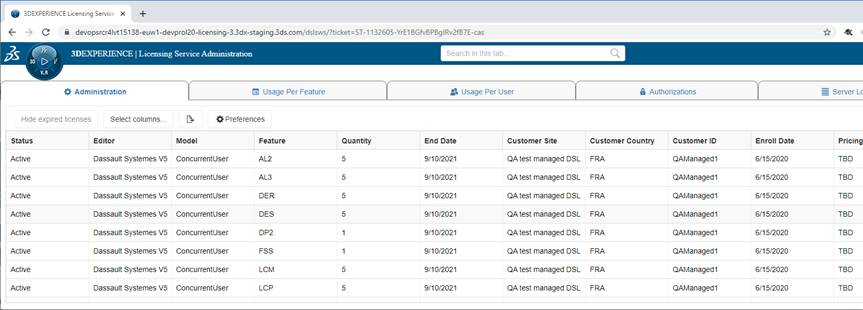
The 3DEXPERIENCE Licensing Service Administration page (resembling the local administration tool) is displayed:

As usual, tab columns (except in the Authorizations tab) can be re-ordered by dragging and dropping (except on Firefox so far), and column sorting is available by clicking on the column names, optionally with the Ctrl key for multi-sorting.
Searching by clicking
 in the top bar is only active in the Server Logs tab. The Find function is delegated to the browser, typically by using Ctrl-F.
The
 icon on a line indicates that details are available by clicking the icon. You can also access details by double-clicking the line.
Click
 in the tab to export data in that tab to a .csv file. In the Authorizations tab, however, data are exported and imported in a more appropriate XML format.
 -
Perform any authorized operations.
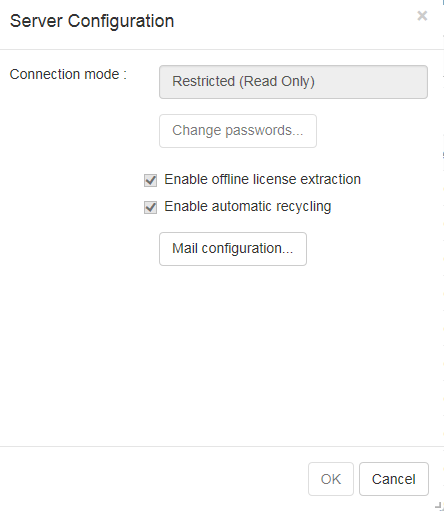
Minimal server configuration tools are available by clicking Preferences:

The operations you can perform are the following:
- add authorization rules
- configure license expiration alerts
- get license usage information
- change passwords
- consult logs stored on the license server
but you cannot:
- stop the license server
- change the license server configuration: port numbers, member names..
- enroll and delete license keys
- stop usage tracing
- enable statistics
- access monitoring data
- declare certain e-mail alert types.
As is the case for on-premises failover license servers, three e-mails are sent when licenses are about to expire and e-mail alerts have been activated.
- Disconnect by clicking
 in the top bar, then Disconnect.