Split Branches
You can split a branch into two branches.
- From the Branch section of the action bar, click Split Branch
 . You are prompted to select a branch to determine the branch point at which you want to split it.
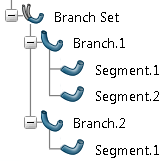
Our example shows a electrical branch geometry comprising two branches. The first branch contains two segments and the second one, only one.
- Move the pointer over a branch.Labels identifying all branch points appear in the work area making it easier to select the branch point.
- Select a label or select the branch near a branch point.If you select a branch, the app finds the branch point closest to your selection.
The branch point is highlighted.
The Split dialog box appears. At this step, you can choose to split the branch at the highlighted branch point or create a new one.
Note: If there are no branch points available, the app proposes to create a new one. To split a branch on a new branch point:
- Select the On a new branch point option.
- Click OK.
- Select the branch on which you want to create the branch point. The Branch Point dialog box appears. For more information about the window, see Creating an Electrical Branch Geometry.
- Create a branch point.
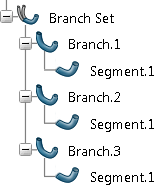
- Click OK.Branch.1 is split at the selected branch point. A new branch is created (Branch.3). Both branches 1 and 3 now contain one segment only.
After the split, tangent continuity between the segments is maintained.
The two resulting branches have their own curves and parameters such as bend radius, diameter, etc. Curves and parameters can be edited separately for each branch.
| Important: After splitting a branch, you must reroute conductors. |
