Using Length and Angle Editors in Track Definition | |||||
|
| ||||
-
From the
Simulation section of the action bar,
click
New Track
 .
The Track Authoring context toolbar appears.
.
The Track Authoring context toolbar appears. -
Select the product to move.
The Robot snaps on to the product you selected (if you selected several products, the Robot is attached to the first one you selected). The context toolbar proposes a set of commands for Track authoring and the Experience Player appears.
The Track Authoring dialog box can be accessed by clicking Track Authoring
at the
right edge of the work area.
- Move the product by approximately 200mm. You can do this by dragging the small triangle along the graduated scale.
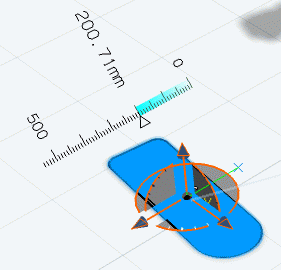
- Input "200mm" in the length editor, then click in empty space outside this editor.
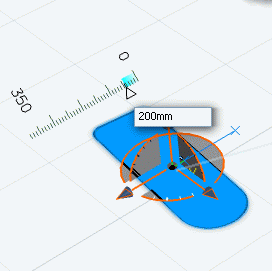
The product moves by 200mm from the previous trajectory point.
- Rotate the product by approximately -45 degrees. You can do this by dragging the small triangle along the graduated scale.

- Input -45 degrees in the angle editor, then click in empty space outside this editor.

The product rotates another 45 degrees.
-
Click OK in the Track Authoring dialog box to create the Track.
The final position is as shown below.
