-
From the
top bar,
select
> Systems Architecture > Functional & Logical Design >
Tooltip
. For more information, see
Tooltip
-
Select your environment:
-
In the
Domain list, select an
RFLP category
(Functional in our example).
-
In the
Object list, select the object for which
the tooltip will be customized. (Function DS in our
example).
-
Select an existing attribute from the
Available attributes list, and then click the
Add arrow.
The selected attribute is listed in the
Displayed Attributes area.
-
To add a customized text:
-
Click
Add Text.
The
Text Definition dialog box appears.
-
Type your text.
-
Click
OK to validate.
The typed attribute is listed in the
Displayed Attributes area.
-
To remove an attribute, select the attribute and click the
Remove arrow.
-
Optional: If you want to display the attribute name
after the value, uncheck the
Display Attribute Name before its value option
(by default, this option is selected).
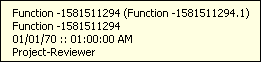
For example:
| "Display attribute name before its
value" is selected
|
"Display attribute name before its
value" is not selected
|

|
|
-
Click
OK to close the
Preferences
dialog box and apply your settings.
The new attributes are now displayed when the pointer
pauses over the appropriate object.

|
 > Preferences > App Preferences > 3D Modeling
> Systems Architecture > Functional & Logical Design >
Tooltip
. For more information, see
Tooltip
> Preferences > App Preferences > 3D Modeling
> Systems Architecture > Functional & Logical Design >
Tooltip
. For more information, see
Tooltip