-
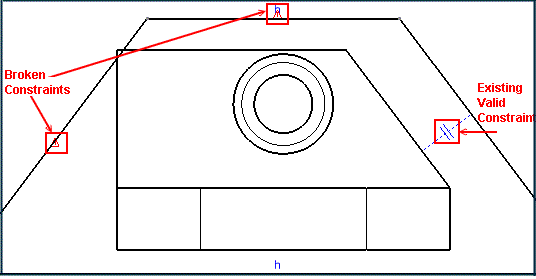
Modify the 2D shape in such a way that some constrained generated geometry will be modified or deleted.
-
From the standard area of the action bar, click Update.
Broken constraints are represented by a red warning-like symbol

. Valid constraints are also displayed.

Notes:
- When deleting a use-edge, the constraint created with it is broken.
- When selecting the geometry and its constraints for copy-paste operations, broken constraints are kept and pasted too. If the entire geometry is not selected, constraints are not copied.
- The color used to visualize broken constraints is the color defined for inconsistent elements by selecting Activate geometries' diagnostic check box and clicking Configure in
section, under Elements Analysis.
- The size used as a reference to display broken constraints is the same as the reference size defined for constraints (2 mm by default) in
section, under Constraints Display.
-
Move the pointer
over the broken constraint symbol, to find out the original type of a broken constraint.
The constraint type is displayed in the status bar.
-
Right-click a broken constraint and select Delete or press the Del key.
The broken constraint is deleted.
- Optional: Delete some geometry.
The associated constraint is also deleted.
You have now learn to visualize broken constraints.