You can export drawings (that is, polylines or polygonal areas)
to GeoJSON format to be able to tune GIS data through a dedicated editor (such
as QGIS). The modified data can then be uploaded to the
3DEXPERIENCE platform
and added to your experience.
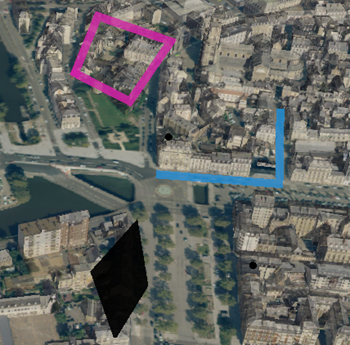
These drawings can be polylines or polygonal areas
created through Create Area or Create Polyline.
For example:
If the drawings to be exported are not located under a node in the tree,
right-click in the tree, select Add Group, and then move
the drawings to be exported to this new group node.
Right-click the node containing the drawings to be exported, and then select
Export Drawing.
A tab named "exported_node_name.geojson" is displayed at
the bottom of the widget.
Click the up arrow next to the tab name, and then select
Show in folder to display the storage location
on your local disk.
By default, the file is saved in
C:\Users\user_name\Downloads.
Open the data editor then drop the .geojson file to the editor.
Select the layers to be added then click
OK.
Make the necessary adjustments.
Modified polygonal area
Save or export your changes to GeoJSON format.
From the Compass, click 3D Modeling
Apps.
Click City Upload Assistant.
Upload the .geojson file to the appropriate collaborative space.
From the
Compass,
click
Social and Collaborative
Apps.
Click
3DSpace.
From
3DSpace,
drag the .geojson file to your experience.
The modified drawings are now visible in your experience.
They are identified by the symbol in the tree which means that it is a dynamic
layer managed as geospatial data (based on a query on EXALEAD CloudView),
and thus the drawings cannot be edited.
Tip:
To keep your
temporary items when saving your experience, move them from the Temporary
Items folder to any other permanent location in the tree, or create a
dedicated group.
 or Create Polyline
 .For example:
 symbol in the tree which means that it is a dynamic
layer managed as geospatial data (based on a query on EXALEAD CloudView),
and thus the drawings cannot be edited.
symbol in the tree which means that it is a dynamic
layer managed as geospatial data (based on a query on EXALEAD CloudView),
and thus the drawings cannot be edited.