-
Select a plane in the
3D area.
-
Click
Sketcher
 in the
context toolbar.
in the
context toolbar.
The
Sketcher
app
is activated.
-
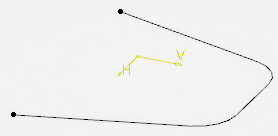
Create a profile and exit
Sketcher.
-
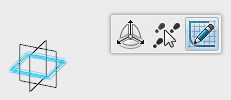
Select an element of the sketch and click
Robot
 in the
context toolbar.
in the
context toolbar.
The
Robot
is connected to the sketch and another
context toolbar
appears.

-
In the
context toolbar, select:
-
Create features mode
 , ,
-
Global Mode
 , ,
-
Same dimension
 , and
, and
-
Translate
 . .
-
Drag the
Robot handle.
The sketch is translated and Translate.x is added to the
tree.
The
Robot
is replaced by an arrow manipulator and a ruler appears.
You can use the both the manipulator and the ruler for
further manipulations.

-
Press
Esc
to undo the last step.
The
Robot
is reset and the feature is removed from the
tree. The
Robot
context toolbar
remains active.
-
Click
Offset
 and move again the sketch.
A parallel curve is created and Parallel.x is added to the
tree.

-
Press again
Esc
to undo the last step.
-
Click
Upper dimension
 and manipulate the sketch again.
An extruded
surface
is created and the
Extrude.x
node is added to the
tree.

Note:
In the
context toolbar, the last family is no longer available, as no
Translate
or
Offset
manipulation is possible when
Upper dimension
is selected.
-
Press
Esc
to undo the last step. Keep only the sketch removing the extrude feature.
-
From the
Wireframe
section of the
action bar, click Plane
 to create a plane selecting xy plane as
Reference
and an
Offset. to create a plane selecting xy plane as
Reference
and an
Offset.
-
Select an element of the sketch and click
Robot
in the
context toolbar.
-
Drag the handle toward the plane until the copilot
appears.
For more information, see
Copilot.
-
Press
Enter
or click the background to validate the command.
The
Robot
is disconnected.
|