 -
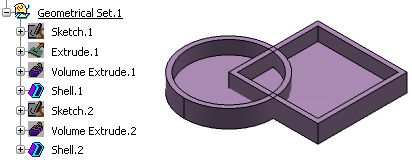
From the Volume section of the action bar, click Union Trim
 . .
-
In the Volume to trim box, select the volume to be trimmed.
-
In the Cutting Volume box, select the cutting volume.
-
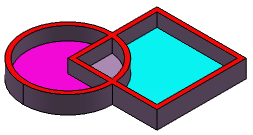
Click the Faces to remove box and select
Shell.2 's inner face.
The selected face appears in pink, meaning that the app is going to remove it. 
-
Click the Faces to keep box and select the inner face
of Shell.1.
The selected face appears in light blue, meaning that the app is going to keep it.
-
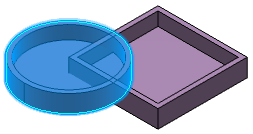
Click Preview to
check whether your specifications meet your needs or not.
-
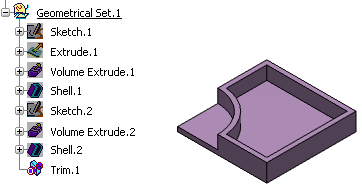
Click OK to compute the material to be
removed.
The operation (identified as Trim.xxx) is
added to the tree. The tree and the Trim representation now look like this:
Notes:
- You can edit a Trim feature and modify the destination volume. Double-click
the feature in the tree and select a new volume in the Cutting
volume box.
- You can also swap the input volumes: Right-click the Base
object box and select the Swap operands
contextual item. This capability only works when both volumes belong to the same
geometrical set or ordered geometrical set.
- As much as possible, avoid selecting volumes trimmed by the operation. In some cases, defined trimmed volumes have the same logical
name: the app then issues a warning message requiring a
better selection.
- If you want to perform the Union Trim operation and create
a datum feature, you need to activate the Create Datum
command. Ensure that you activate it only after selecting the required volumes and
faces in the Trim Definition dialog box and before clicking
Preview. Activating the datum
command at any other instance may result in the failure of Trim
operation.
|
 to display the list of
selected faces.Notes:
to display the list of
selected faces.Notes: