-
In the App Options panel, click Parallel Command Session
 .
.
The Parallel Command Session dialog box opens.
-
From the Modification section of the action bar, click Matching Constraint
 .
.
The
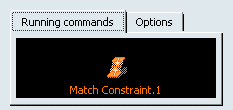
Match Constraint dialog box opens and Match Constraint.1 is added to the
Parallel Command Session dialog box.

-
Match the surfaces and click Apply in the Match Constraint dialog box.
-
From the Modification section of the action bar, click Control Points
 .
.
The
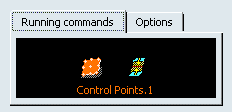
Control Points dialog box opens and Control Points.1 is added to the
Parallel Command Session dialog box.

The order of the commands in the list is inverse to the order of execution of the commands: the first command launched is at the last position and the last command launched at the first position in the list.
The first command in the list, i. e. the last command launched is automatically active.
-
Select the source surface and modify it.
-
Click Match Constraint.1 in the Parallel Command Session dialog box or press F11.
The
Match Constraint dialog box is reactivated.
You can now change options in the Match Constraint dialog box and return to the Control Points dialog box by clicking the Control Points.1 or pressing again F11.
-
Right-click Control Points.1 in the Parallel Command Session dialog box.
A context menu appears where you can select various display options.
-
Click OK in the Parallel Command Session dialog box.
All commands active in the parallel command session are terminated, and the operations applied will be carried out.
Note:
If you select Cancel, all commands active in the parallel command session are terminated. All operations applied are lost and the geometry is reset to its original state.