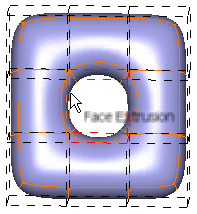
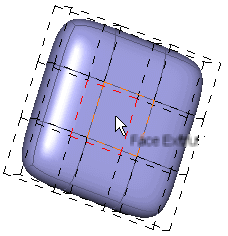
Extrude Faces
You can define the extrusion mode.
- From the Shape Sculpt section of the action bar, click Extrusion
 .
.Tip: You can also access this command by pressing ALT+SHIFT+X. - From the Tools Palette, click Face Extrusion
 .
.Three extrusion modes are available:
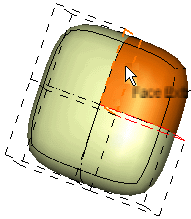
Create a Combined Extrusion
You can extrude faces and perform merge and join operations.
Before you begin: Create a 3D shape containing a subdivision surface.
- From the Tools Palette, click Combined Extrusion
 .
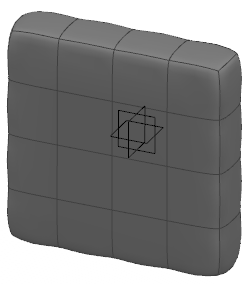
. - Click the subdivision surface to add a face.An extrusion made of five faces is created. The extrusion direction is normal to the selected face.
Extrude Faces Using Multi-Selection
You can extrude faces by selecting several faces.
Before you begin: Create a 3D shape containing a subdivision surface with several faces.
- Click the subdivision surface to add as many faces as you wish.

Tip: As an alternative, you can also press Shift and draw a trap to extrude several faces.
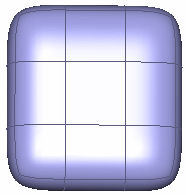
Fill Faces
You can use the Extrude command to fill several faces.
Before you begin: Create a 3D shape containing a subdivision surface with several faces.
Press Ctrl and select the four connected faces.
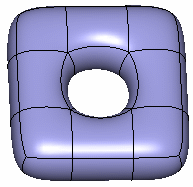
The hole is filled.
| Tip: As an alternative, you can also press Shift and draw a trap to fill the hole. |
Combine an Extrusion
You can use the Extrude command to combine an extrusion.
Before you begin: Create a 3D shape containing a subdivision surface with several faces.
Press Ctrl and select the two connected faces.
The two connected faces are combined.
Join Two Faces
You can use the Extrude command to join two unconnected face-to-face faces.
Before you begin: Create a 3D shape containing a subdivision surface with several faces.
Press Ctrl and select the two faces to
connect.
Make sure faces are face-to-face.
| Tip: As an alternative, you can also press Shift and draw a trap to fill the hole. |
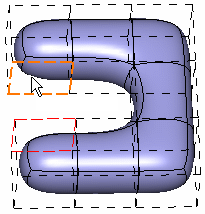
Create a Hole Inside a Closed Surface
You can use the Extrude command to create a hole inside a closed surface.
Before you begin: Create a 3D shape containing a subdivision surface with several faces.
Press Ctrl and select a face on each side of
the surface.

Make sure faces are face-to-face.
Create a Pure Extrusion
You can extrude faces and modify the length of extrusion.
Before you begin: Create a 3D shape containing a subdivision surface.
- From the Tools Palette, click Pure Extrusion
 .A graphic manipulator appears.
 - Click the subdivision surface to add a face.

Create a Total Extrusion
This mode lets you extrude all the faces of an open surface and keep the input faces. It also lets you modify the length of extrusion.
Before you begin: Create an open surface.
- From the Tools Palette, click Total Extrusion
 .An icon to manage the attraction appears in the Tools Palette. A slider and a graphic manipulator also appear.
 - Click the subdivision surface to add a face.
Tip: You do not need to select a face as all faces are automatically selected. 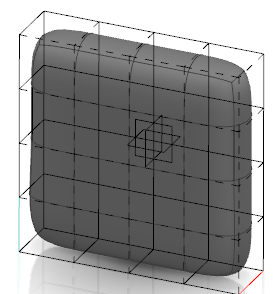
- Optional: Click Sharp Attraction
 . This icon has two states:
-
Sharp Attraction: Defines sharp attributes of the selected edge (value indicated with
a minus sign) that are discontinuous in tangency and curvature.
 Smooth Attraction: Defines
smooth attributes of the selected edge that are continuous in
tangency and curvature.
Smooth Attraction: Defines
smooth attributes of the selected edge that are continuous in
tangency and curvature.
- Optional: Drag and move the pointer to add weight to the extrusion.