-
From the
Generic Insulation section of the
action bar,
click
Profile Insulation
 . .
-
In the
Profile Insulation panel, select the type and
enter the title of the insulation object.
You can keep the default title derived from
the selected type.
-
Select any of the following types of contour:
| Option | Description |
|---|
Single contour
 |
Lets you select a single contour and enter the
thickness. |
|---|
Double contour
 |
Lets you select inner and outer contours. The
Thickness box becomes
unavailable. |
|---|
-
Under
Support, select the reference curve for the
insulation to follow.
In case of a structure stiffener, you can select its delimited trace
by selecting the stiffener in the 3D area or the tree. You can also select the stiffener set node in the tree to select delimited traces of all stiffeners available in the set.
You can click
... to manage multiselection.
-
Under
Contour Definition, select the contours.
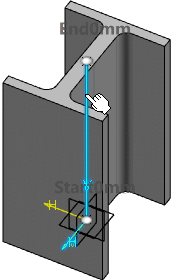
- Optional:
Modify the insulation limits using the handles.
-
Under
Material & Thickness, select the material
and the thickness for the insulation.
-
Click
OK.
The insulation is created.

|
