-
From the Result section of the action bar,
click
Snapshot
 .
.
The
Snapshots dialog box appears.
-
In the
tree,
select a
scenario result.
-
To add a step for snapshots, use the
Simulation Player to cue up the
animation to the step at which you want to capture a
snapshot, and click
Add in the
Snapshots dialog box.
-
To add all the steps, click
Add All.
-
To remove a step, select the step you want to remove in the
Time values list, and click
Remove.
-
To remove all the steps, click
Remove All.
-
When you have selected all of the desired steps, click
OK.
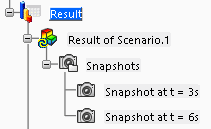
Snapshots for the selected steps are created simultaneously and
appear in the
tree
under the
Result node. For example:
Snapshots can be imported
into a Validation for review and collaboration in the Design Synthesis
app. To import snapshots into DMU Validation objects,
you must have a license for the Design Synthesis
app. For more information, see the Design Review User's Guide.