Creating Curtain Walls | |||||
|
| ||||
-
Create a mass that incorporates the shape of the curtain wall.
For example, for a curved curtain wall, the mass should incorporate the curved side slated for the curtain wall.
-
From the Building section of the action bar, click Curtain Wall
 .
.
-
From the building, click the mass surface that you want to convert to a curtain wall.
Tip: To display a different isometric view of the building, use the View Selector  .
. -
In the Curtain Wall dialog box, click Sizing
 .
.
-
From Sizing, optionally, enter or select new values.
- Transom thickness, which is the vertical dimension of the horizontal members measured parallel to the exterior surface of the curtain wall.
- Transom offset, which is the distance the horizontal members are moved perpendicular to the exterior surface of the curtain wall.
- Transom depth, which is the horizontal dimension of the horizontal members measured perpendicular to the exterior surface of the curtain wall.
- Mullion thickness, which is the horizontal dimension of the vertical members measured parallel to the exterior surface of the curtain wall.
- Mullion offset, which is the distance the vertical members are moved perpendicular to the exterior surface of the curtain wall.
- Mullion depth, which is the horizontal dimension of the vertical members measured perpendicular to the exterior surface of the curtain wall.
- Border thickness, which is the dimension of the perimeter members measured parallel to the exterior surface of the curtain wall.
- Border offset, which is the distance the perimeter members are moved perpendicular to the exterior surface of the curtain wall.
- Border depth, which is the dimension of the perimeter members measured perpendicular to the exterior surface of the curtain wall.
- Panel Offset, which is the distance the glazing panel is moved perpendicular to the exterior surface of the curtain wall.
- Panel Depth, which is the dimension of the glazing panel measured perpendicular to the exterior surface of the curtain wall.
Tip: To view the effect of a value entry, click the curtain wall, or press either Tab or Enter and click outside the dialog box. - To mirror the pattern of mullions:
- In the Curtain Wall dialog box, click Mirror Mullions
 .
. - To set the position of the vertical blue line, from the 3D area, click and drag the handle of the vertical blue line.
- In the Curtain Wall dialog box, click Mirror Mullions
-
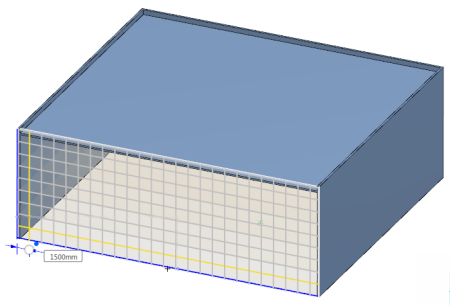
In the 3D area, make the desired changes to the curtain wall pattern as follows:
- To adjust the position of the entire pattern, drag the blue handle of a blue line to one of the predetermined locations indicated by the small x.
Each small x appears when you begin to drag the blue handle.

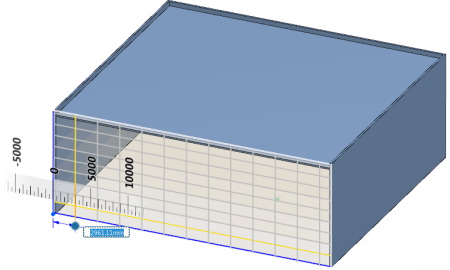
- To adjust the space between the repeated lines in a pattern definition, reposition the yellow line:
- Select a yellow line.
- Drag the handle to the desired dimension or enter the appropriate dimension in the value
box.

As you drag the handle, the system displays a ruler to guide you. When positioning yellow lines on a curved surface, the dimension entered is the chord of the arc.
- To add additional lines into the repeating pattern, select a gray line.
The gray line changes to yellow and becomes part of the repeating pattern definition. Selecting a gray line converts it and any other gray lines between it and the last yellow line into yellow lines. These additional yellow lines also become part of the repeating pattern definition.
- To remove a yellow line from the pattern definition, right-click the line and click Delete Line.
- To adjust the position of the entire pattern, drag the blue handle of a blue line to one of the predetermined locations indicated by the small x.
-
Click
 .
.