Creating a Filtered View From a 3D Tolerancing & Annotation Capture | |||||
|
| ||||
- From the View Layout section of the action bar,
click
View From Reference
 .
. - Right-click anywhere in the empty space and deselect the Create Datum
 option.The view type is automatically set as per a 3D Tolerancing & Annotation view.
 -
In the tree, select a capture.
Important: You can only select 3D Tolerancing & Annotation captures associated with a view/annotation plane.
- Click in the sheet to position the view.
When you move the view for placement, the view stays aligned and oriented according to the preference selected in Me
 > Preferences > App Preferences > 3D Modeling > Mechanical Systems
> 2D Layout for 3D Design > View Creation, under View From
Reference.
 That is, if the Align according to the active view (SHIFT toggles) and Set orientation according to the active view preferences are selected, then the following are considered for positioning the view:
- The view can be moved either along the folding direction or perpendicularly to it. Both these directions are represented by two dashed lines.
- The origin of the created view stays on the folding line containing its projection in the 3D background of the active view.
- The view is oriented according to the current orientation of the active view.
- You can also modify the 3D definition of the view plane in the View Creation dialog box to update the position and orientation of the view and make it consistent with the active view. This is unavailable for views created from 3D Tolerancing & Annotation views and captures.
If these preferences are cleared, the view can be moved freely in the sheet.
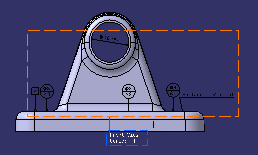
An empty front view is created and activated. The 3D background is displayed in the 2D layout according to the definition of the reference capture, and along the plane of the associated view.

-
Right-click the front view and select Filter > Change View Filter....
The Change View Filter dialog box appears.
An equivalent filter is created. This filter is associative with the selected capture.
Notes:- You can also create new filters from the resulting equivalent filter.
- The equivalent filter manages the product components while creating a 2D layout view or modifying the FTA capture.
- The 2DL equivalent filters are created according to the favorite context of the 2D layout. If the context is not consistent, the product components are not managed and a warning message appears. For more information, see About Favorite Context.
- Click OK.