-
From the Modelor the
Essentials section of the action bar, click Hole
 . .
-
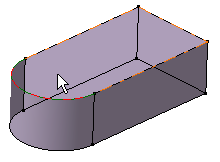
Select the required face on which you want to create the
hole.

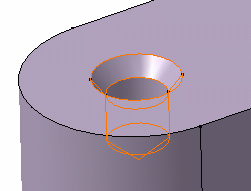
A preview of the hole appears on the object. The sketcher grid appears to
assist you position the hole.
-
In the
Hole.x dialog box,
-
Select the required hole type from the list:
| Option
|
Hole Type
|

|
Simple hole
|

|
Tapered hole
|

|
Counter bored hole
|

|
Counter sunk hole
|

|
Counter drilled hole
|
-
From the Geometric standard list, select the
required hole standard, if applicable.
Notes:
- If you select a hole standard that contains thread
parameters, the Thread mode list is
deactivated.
- If you set standards files in both
Data Setup
and installation directory, the standard files set in
Data Setup
are given priority.
- The standards set using
Data Setup
are available only in the online mode.
-
Select the required description from the
Geometric description list, if applicable.
-
Configure the standard parameters, as applicable.
-
Select the required anchor point, as applicable.
-
Configure the hole parameters.
- Optional:
Select the Mechanical Interfaces tab and configure the
parameters for generating tolerances and instantiating a mechanical interface
template.
-
Click
 , to check if an associated mechanical interface template is
available. , to check if an associated mechanical interface template is
available.
-
Click
 , if the
generation of tolerances and annotations is not required. , if the
generation of tolerances and annotations is not required.
-
A list containing all the interface templates associated with the
selected hole type or thread/tap with their name, type and nature is
displayed. You can select the required check boxes to configure the
interface template’s use (one time or always).
-
Click
 to cancel
the selection. to cancel
the selection.
An instance of the selected interface template is created on the hole or
thread feature.
-
Click
OK.
The hole is created. A hole node is added to the tree. In
addition, the
sketch that was used to create the hole also appears
under the hole node in the tree.

Note:
You can click 3DMaster query
 in the App Options panel and move the mouse pointer over a hole in the 3D area or tree to view technological information in the tool tip. in the App Options panel and move the mouse pointer over a hole in the 3D area or tree to view technological information in the tool tip.
|
 .
.


 , to check if an associated mechanical interface template is
available.
 , if the
generation of tolerances and annotations is not required.
 to cancel
the selection.

 in the App Options panel and move the mouse pointer over a hole in the 3D area or tree to view technological information in the tool tip.