Creating Deviation Reports

Once you have performed a deviation analysis, you can create a deviation report from it.

  • You define which information or images you want to insert in this deviation report. This is done in the Deviation Report dialog box.
  • A node Deviation Check is created. It is dedicated to annotations and deviation reports. A 3D Shape Representation can contain only one Deviation Check node.
  • Once you have validated those data, a Deviation Report feature is created. It is associative with the deviation analysis and the annotations it is based on. If you modify the deviation analysis or the annotations, the deviation report is updated accordingly. You can edit the Deviation Report feature at any time.
  • You can now export the Deviation Report feature to an html file.

See Also
About Deviation Reports
  1. Perform a deviation analysis, and create annotations, if required.
    You have created something like that:
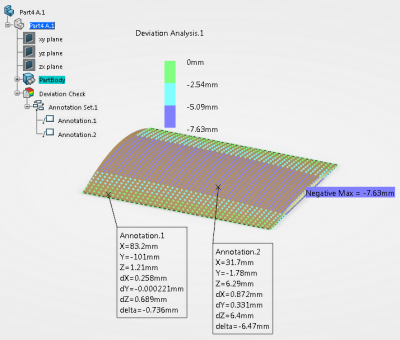
  2. Capture some images and save them either in a directory or in an album.
  3. From the Control section of the action bar, click Deviation Report .
    • If it does not yet exist, a Deviation Check node is created.
    • A node Deviation Report.1 is added under Deviation Check.
    • The Deviation Report dialog box appears.
  4. Fill in the dialog box. Click OK when you are done.
    A Deviation Report feature is created.
  5. Right-click the Deviation Report and select Definition to edit it or Export Deviation Report to export it to html.