Creating Rebar Tables | |||
| |||
-
If you want to work with Multi-Discipline Drafting, do the following:
-
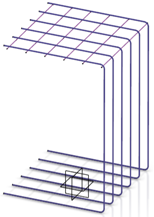
Open a product containing the 3DShape with the 3D representation of the rebars, for
example:

- Select it and click the Insert Drawing contextual command.
- Double-click the drawing to switch to the Multi-Discipline Drafting app. A sheet is created.
- To specify a view of the 3D representation, click Front View from the Smart Views section of the action bar for example.
- Go back to the 3D representation tab to select a drawing plane. You switch back to the drawing tab. All the bars are projected in the drawing plane.
-
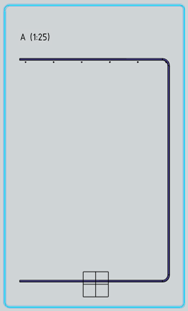
Click the 3D area to
validate. A Front view is created.

-
Open a product containing the 3DShape with the 3D representation of the rebars, for
example:
-
If you want to work with 2D Layout for 3D Design, do the following:
- Select the 3D Shape containing the 3D representation of the rebars and go to 2D Layout for 3D Design.
-
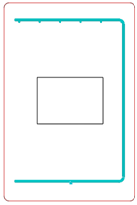
To create a new view of the 3D representation from a plane, click View
from Reference from the View Layout section of
the action bar for example. You obtain:

-
In the Multi-Discipline Drafting
app, click
Rebar Table
 from the Civil Engineering section of
the action bar,
or in the 2D Layout for 3D Design
app, click
 from the
Annotation section.
The Rebar Table dialog box is displayed.
 -
Select the Front view and, the View box is filled in with the
name: Front.
All the rebar layers that are displayed in this view are listed in the Selection box automatically. Click the three dot button next to Selection to display the Element list to select a single element or all the elements in the Export Rebar dialog box.
When layers are detected with bar marks, the Options field appears in the Export Rebar report dialog box accompanied by a check box and the bar mark names.
-
In Options, select the bar marks you need in the table.
A Bar Mark column will appear in the table indicating the bar mark reference for each layer, see the image below. For more information about Bar Marks, see About Bar Marks.
-
To specify the destination folder of the report, click
 .
A panel indicates the path of your directory. You can change it by clicking
 .
. -
To generate the rebar tables, do either of the following in the
Format area:
-
Click Bending schedule table
 to create a single table. The table displays the same
content (text and images) as the Report. For
more information, see About Rebar Reports.
-
Click Bending schedule and thumbnail table
 to create two tables, one with the layers' properties (see
 in the image below) and a second one with the thumbnails
(see
  ).
In the first table, the Shape column contains a number to
identify the corresponding image. If bar marks are detected, the
Shape column is renamed Bar Mark and
the bar mark references are used as a legend for the thumbnails.
One or two drawing tables are generated from the 3D design of the rebars:
The tables reflect the 3D view content. When you modify the 3D representation of the rebars, you can regenerate the tables. Delete the previous tables before.
You can zoom in/out on the tables, and move them within the sheet.
By default, Concrete Structures 3D Design proposes those two formats. You can also add other formats (a new icon for a dedicated command) to suit your civil engineering project. Usually, the BIM manager responsible for the civil engineering project performs the customization tasks. The sample files to customize are in
win_b64\resources\Civil\RebarsDrawingFor more information, see Procedure to customize the Export Report command. -
-
To edit a cell in the table, double-click it.
A Text Editor panel opens. You can save the drawing with these modifications.
To restore the default table, click Bending schedule table or Bending schedule and thumbnail table again.
-
Optional: To simplify the report and create a single line in it by grouping
all the adaptive rebar layers with similar shapes, do the following:
-
Modify the delivered ConcreteDesign.xml file in the
...\startup\Civil\ConcreteDesigndirectory. - Add it in the Data Setup in Building & Civil Resources table by selecting the resource name, Concrete Design Customization, and by choosing the assigned resource (.xml).
By default, the
<GroupSimilarBars value="false"/>in the .xml file. If you change it intotrueand add the separator "-" between sections, to indicate when sections vary. For more information, see Concrete Design Customization. . The report displays:- In the Lengths column, the average length of the bars is displayed.
- In the column related to the dimension with the variable length, the minimum length and the maximum length of the straight section are displayed and separated with the separator specified in the .xml file.
- In the thumbnail picture of the layer, the shape of the bar is displayed with the
dimensions of each straight bar section. Depending on how the dimensions are
requested to appear in the picture, the dimension display is slightly changed in the
picture for the variable section:
- If the DimensionLetters id is set, then the separator is added before the dimension letter.
- If the DimensionValues id is set, then the minimum length and the maximum length of the section with the separator between those values is displayed (the same as in the related dimension column).
- If the separator value is changed to be different from "-", then this string is used and inserted between the minimum and maximum length values of the variable bars section.
If the GroupSimilarBars value is false and the separator value is "-", then the behavior remains the same.
If the value of the already existing option AdaptiveLayersIndividually is true (default value), the GroupSimilarBars and Separator values are not taken into account because numbering bars individually and grouping similar bars are not compatible.
Note: If a rebar layer is made of bars that do not have the same number of straight sections, the line simplification in the report is not processed. -
Modify the delivered ConcreteDesign.xml file in the
-
To filter the layers, click the view and Edit Filter
 in the context toolbar.
The filter command is available in the 2D Layout for 3D Design app only. You can hide a layer and it will not be visible in the drawing table when you generate it.