-
From the Reinforcement section of the action bar, click Rebar Creation
 . .
- Click Wire selection
 to define a rebar layer based on wires. to define a rebar layer based on wires. - Click Picking Point
 . . The Picking Point rebar creation mode is turned on. -
Select a point. To do so, either:
- Select an existing point.
- Create a point by right-clicking the 3D area, and selecting in the context menu.
The dedicated CATIA Rebar Routing 3D Design app opens.
The Node Table panel that stores the point coordinates also appears.
For more information, see Node Table Panel. -
Start creating the rebar by clicking the point.
 Note:
If you select Pick Surface From Selection option, select any surface to
start routing along a surface. The Routing along Surface command
is turned on. For more information, see Routing along a Surface.
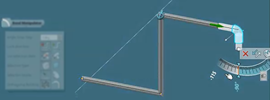
- Manipulate the Bend, Length and Orientation manipulators according to your needs.
-
Click Exit
 in the action bar. in the action bar.
- Configure the rebar position, adjust parameters, configure the pattern if necessary, and specify hooks and bends.
See About Configuring the Rebar Position, Patterning, Handling Bar Extremities and Handling Bends.
|