Adjusting the Product Position

You can adjust the position of a product on a gondola to place it in the most appropriate and convenient way.

Required access roles: Author, Leader

This task shows you how to:


Before you begin: For more information, see Inserting Products.

Rotate a Product

You can rotate a product or any selected object to modify its position on a specific axis.

  1. Select the product you want to rotate.
  2. Click X-axis to change the position of the product according to a horizontal axis.
  3. Click Y-axis to change the position of the product according to a vertical axis.
  4. Click Z-axis to make it turn on itself.
    The product is rotated.

Align Products Automatically

You can align products on fixtures using automatic alignment.

Before you begin: Activate automatic alignment from the Align menu.
  1. Select the fixtures, gondola section, or the gondola on which you want to align the products.
  2. In the Align menu, select an alignment type.
    • Click Left Align to align the products to the reading direction.
    • Click Right Align to align the products to the inverse reading direction.
    • Click Distribute to distribute the products on the selected fixtures.
    • Click Position Manually to position the products manually.
    • Click Use gondola value to use the alignment configuration of the gondola.

    Notes:
    • Automatic alignment applies only for products, custom furniture, text box, and scenes placed on fixtures.
    • You can define automatic alignment from the properties panel of the gondola or the fixture.
    • In an automatically aligned fixture, if you insert a product such that it clashes with an existing product, the existing product is moved to avoid the clash.
    • In the Align menu, click to deactivate automatic alignment. You can click again to activate automatic alignment.

The products are aligned on the fixture.

Align Products Independently

You can align products placed on a fixture independently. You can also align the products in a consumer decision tree segment.

Before you begin: Deactivate automatic alignment from the Align menu.
  1. Select the required products or a consumer decision tree segment.
  2. In the Align menu, select one of the following options to define the type of objects to align.
    • If you select one or more products:
      • Select Selection to align the products according to your selection.
        Note: This option is selected by default.
      • Select Support to align the products according to the support such as gondola sections, shelves, peg supports, drawers, short shelves, or pallets.
    • If you select a consumer decision tree segment to align products, only the option Segment appears and is selected by default.
    • Click Left Align to align the products to the left.
    • Click Center Align to align the products to the center.
    • Click Right Align to align the products to the right.
    • Click Distribute to distribute the selection between:
      • The first and the last element of this selection (in Selection mode).
      • The left and the right edge of the support (in Support mode).
      • The left and the right edge of the support within the segment boundary (in Segment mode).
    Note: When you align products in a consumer decision tree segment, a red box appears around the products if they do not fit within the segment boundaries. You can adjust the segment width or rotate the products to accommodate them.

The products are aligned on the support.

Use the Free Positioning Mode

You can freely place products in a gondola. This option is available for products and furniture.

  1. Open a gondola.
  2. Select a product placed on the gondola and display its properties.
    For more information, see Displaying the Product Properties.
  3. From the Properties tab, select the Free positioning option to freely place the product in the gondola.
    The handle appears.

    Note: When the Free positioning option is selected, the Automatic depth filling mode is disabled.
  4. Move the product to the required location:
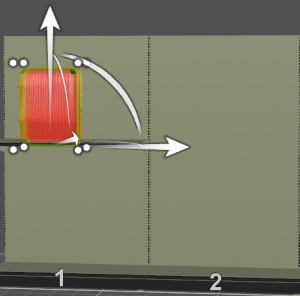
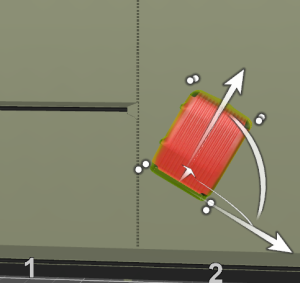
    • Stretch the right white arrow to make it go right or left.
    • Stretch the up white arrow to make it go up or down.
    • Push or pull the middle white arrow to place it closer to the gondola or further away.
    • Use the arc to rotate the product.


    Note: In the Free positioning mode, products may be suspended in the gondola.