About Advanced Postprocessing | ||||||
|
| |||||
Customizing Key Performance Indicators
CST Studio Suite uses a powerful, template-based, embedded, postprocessing capability. You can access the default template as a task in the hybrid solver setup node of the master simulation project, as shown in the image below.

The default template evaluates the default list of KPIs for each coverage test. The KPIs folder, shown in the image above, contains these default KPIs. When configuring the master simulation project, you can create your own user-defined KPIs by defining a new postprocessing task. The User-defined KPIs folder, shown in the image above, contains these user-defined KPIs.
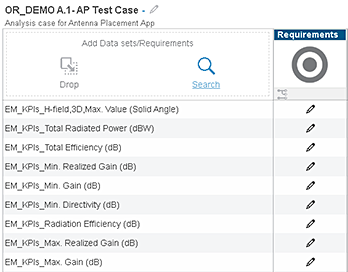
All of the scalar values defined in the 0D templates appear in the list of KPIs for each coverage test. The image below shows a custom list of KPIs in the Performance Trade-off app.
Some CST Studio Suite templates require results for their definition. The easiest way to define these templates is to copy and paste the corresponding postprocessing task from a different simulation project into your master simulation project.
Advanced Postprocessing in CST Studio Suite
You can use CST Studio Suite to examine and modify the CST Studio Suite projects that the Antenna Placement app automatically creates for your simulations. Modifications to these projects do not affect the latest status of the corresponding objects on the 3DEXPERIENCE platform.
The default location for CST Studio Suite projects is as follows: C:\Users\user_name \AppData\Local\DassaultSystemes\CATTemp. After the simulation finishes, you can find the completed CST Studio Suite projects in this location, including all results. To change the default location using the 3DEXPERIENCE platform:
- Click Me
 > Preferences.
 - From the Preference Categories section, click the Common Preferences tab.
- Expand the Deployment and Administration section, and click Batch.
- From the Preference Pages section, expand the Batches section.
- From the Batch Infrastructure section, choose a Directory for batches, logs, and temp files.
- Click OK.