- Procure the media for your operating system, and prepare to install the software as explained in the DS Installer Guide.
The name of the installation media is:
3DSwym-V6R2022x.Windows64.zip on Windows3DSwym-V6R2022x.Linux64.tar.gz on Linux
- Untar/unzip the media to create the following directory:
3DSwym.Windows64 on Windows3DSwym.Linux64 on Linux.
-
Change to the distribution directory.
The directory is:
- 3DSwym.Windows64/1 on Windows
- 3DSwym.Linux64/1 on Linux
then start the installation as follows:
- Windows: double-click setup.exe
- Linux: ./StartGUI.sh for the GUI, or ./StartTUI.sh
The installation procedure then starts:
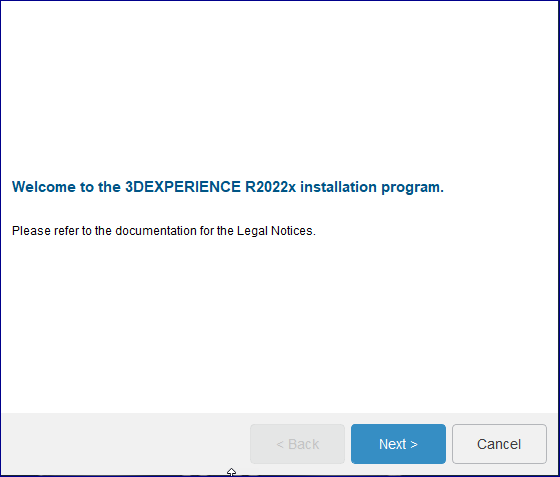
Note:
The dialog boxes are the same on both Windows and Linux.
Click Next.
-
Specify the installation directory.

The default values are:
C:\DassaultSystemes\R2022x\3DSwym on Windows/usr/DassaultSystemes/R2022x/3DSwym on Linux.
Note:
The installation path cannot contain any space characters.
If you accept the default destination folder, click Next, or click
Browse... button and select the desired destination folder. The
folder you choose must be empty. You can also specify a new folder.
Click Next.
- Select
3DSwym
Index
from the list.

Click Next.
- Specify if you want to install embedded Java.
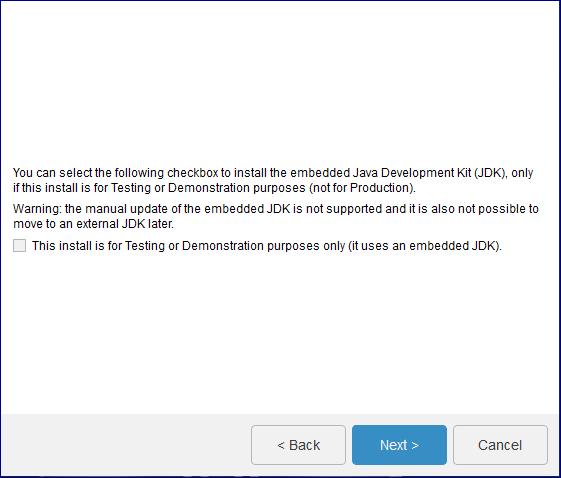
A JDK is required to install the service.
Java is used by:
- the installation program
- the
3DSwym
Foundation
: TomEE (for 3DSwym Content, Widget Platform and Rich
Media Server web applications)
- the
3DSwym
Video Converter
: the external converter daemon.
The This install is for Testing or Demonstration purposes only (it uses an embedded
JDK check box is not selected by default.
If you select the check box, the embedded JDK will be installed in:
C:\DassaultSystemes\R2022x\3DWwym\win_b64\code\serverjre on Windows/usr/DassaultSystemes/R2022x/3DSwym/linux_a64/code/serverjre on Linux.
Choosing embedded Java automatically implies also choosing embedded TomEE+.
Click Next.
-
If you did not check the This install is for Testing or Demonstration
purposes only (it uses an embedded JDK check box, you must specify the Java
Home path.
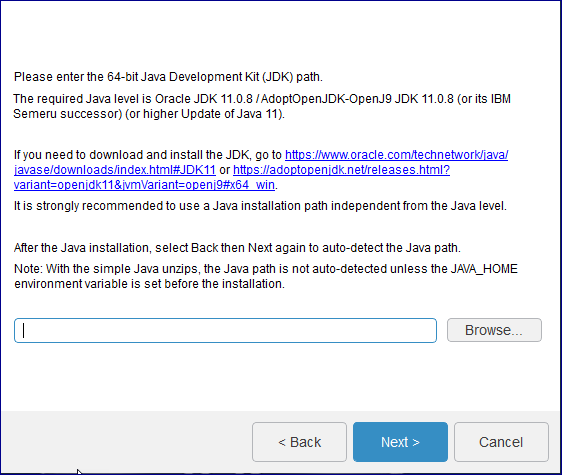
This is the location of your Java Development Kit (JDK).
On Windows, the Java location will be automatically detected.
If you use a local Certificate Authority, register your certificates in this Java store
using the keytool utility.
Click Next.
- Specify the paths.
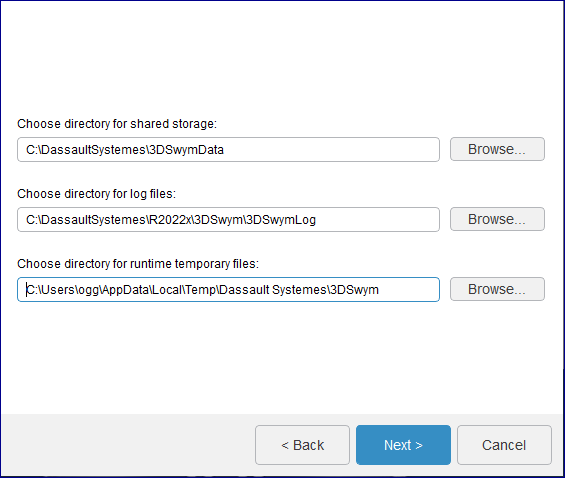
- the shared directory name to be used for storing data; the default is:
C:\DassaultSystemes\3DSwymData on Windows and /share/DassaultSystemes/3DSwymData on Linux. This folder must already exist. We recommend that you use a mounted path for the shared directory. This method is required when each 3DSwym component is installed on a different machine. This is useful when large amounts of data need to be saved, and also facilitates management of a load balanced environment.
need to be saved, and also facilitates management of a load balanced environment.
- the log directory containing application logs; the default is:
C:\DassaultSystemes\R2022x\3DSwym\3DSwymLog on Windows and
/var/log/DassaultSystemes/3DSwym on Linux - the temporary directory used for 3DSwym runtime files; the default is:
C:\Users\user\AppData\Local\Temp\Dassault Systemes\3DSwym on Windows and /tmp/DassaultSystemes/3DSwym on Linux
Click Next.
- Specify the previously configured, dedicated URL endpoints for the 3DEXPERIENCE platform services.
Note:
Do not use uppercase characters in the URLs (standard form specified in
RFC3986).
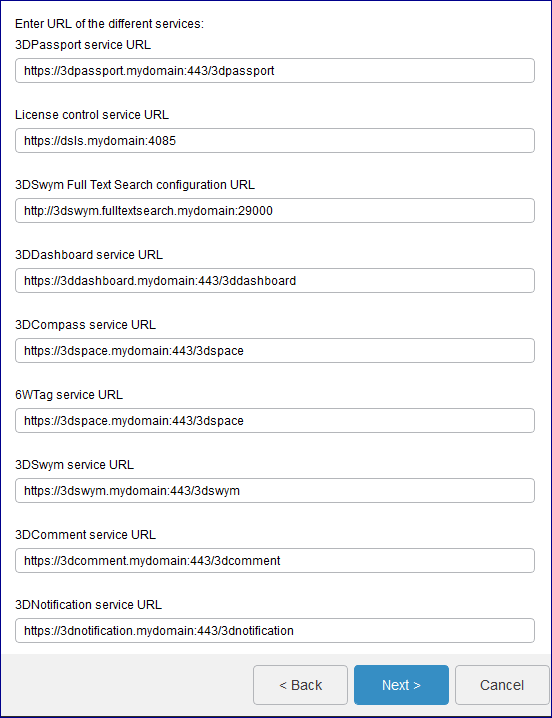
Before you do so, check the following:
- the URLs must contain Fully Qualified Domain Names (FQDN)
- the URLs must start with
http(s):// (and not ftp or other); note that all URLs are https:// except Full Text Search - 3DPassport, 3DDashboard, 3DSwym, 3DComment and 3DNotification must have a root URI if you install all the services on the
same machine
- 3DCompass and 6WTags must have a root URI
- If you install all the services on the same machine, the ports must be different.
Sample URLs (if the services are installed on different machines) are:
- 3DPassport service URL: the default is:
https://3dpassport.mydomain:443/3dpassport -
3DSwym
Index
configuration URL: the default is:
http://3dswym.fulltextsearch.mydomain:29000 - 3DDashboard service URL: the default is:
https://3ddashboard.mydomain:443/3ddashboard - 3DCompass service URL: the default is:
https://3dspace.mydomain:443/3dspace - 6WTags service URL: the default is:
https://3dspace.mydomain:443/3dspace - 3DSwym service URL: the default is:
https://3dswym.mydomain:443/3dswym - 3DComment service URL: the default is:
https://3dcomment.mydomain:443/3dcomment - 3DNotification service URL: the default is:
https://3dnotification.mydomain:443/3dnotification
The license control service URL (default is: https://dsls.mydomain:4085) will only appear if the DSLicSrv.txt file is not present in C:\ProgramData\DassaultSystemes\Licenses (Windows) or /var/DassaultSystemes/Licenses (Linux). The DSLicSrv.txt file will then be created in the correct location, and will contain, for example: dsls.mydomain:4085. The user performing the installation must have write access to the directory containing the file.
Click Next.
- If you are using embedded Java, specify the certificate location.
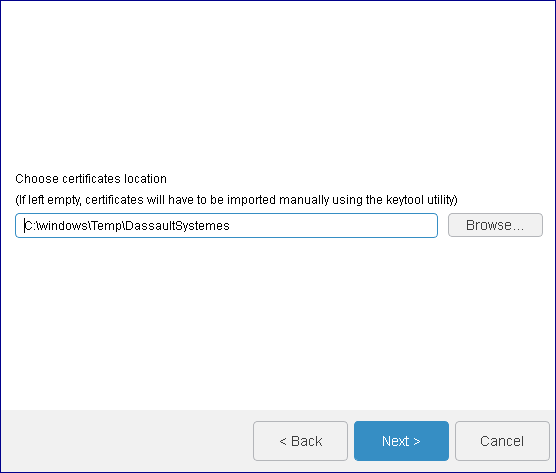
This directory contains the certificates to import into the JVM used by TomEE+.
The default is:
C:\Windows\Temp\DassaultSystemes on Windows/tmp/DassaultSystemes on Linux.
If you leave the path empty, you can import the certificates manually later as a
post-installation step. For more information see Installation and Setup: Install:
3DEXPERIENCE Platform: Reconfiguring the 3DEXPERIENCE Platform
Installation.
Click Next.
-
Select the database type you are using and specify the database
connection parameters.

You can choose between Oracle and SQL Server on both Windows and Linux.
Some of the settings will not be displayed if you already performed a
3DSwym
Foundation
installation (during which you already specified
these settings). For more details, see Installing 3DSwym Foundation.
Specify:
- Administrator name
- Administrator user name that will be used for 6WTags
indexing. This username must be created in 3DPassport as explained in Installation and Setup: Install: 3DEXPERIENCE Platform:
Installing 3DEXPERIENCE Platform Services for the First Time: Installing Services
One-by-One: 3DPassport: Post-Installation: Creating End User Passport Data
Manually in the Local Database and 3DSpace,
and must have administrator rights in 3DSpace.
We recommend that you keep the default
admin_platform user as it is
automatically created with the correct rights.
- Administrator password
- Administrator user password that will be used for 6WTags indexing.
-
If you are using SQL Server, specify the database connection parameters:
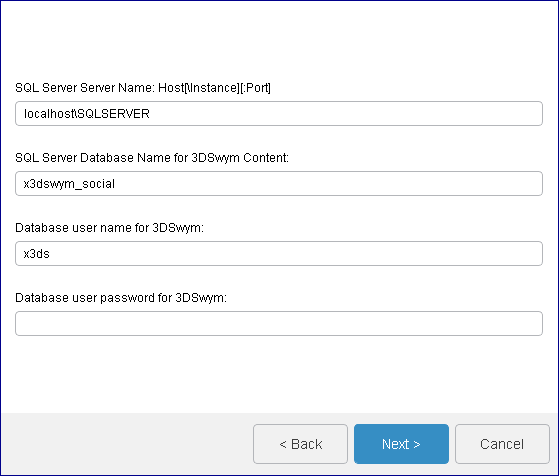
- SQL Server Server Name: Host[\Instance][:Port]
- SQL Server database hostname. The default is
localhost\SQLSERVER.
- SQL Server Database Name for 3DSwym Content
- Database schema name you must already have created as explained in Create Databases and Database Users. The default is
x3dswym_social. It should be empty in the case of a fresh
install from scratch.
- Database user name for 3DSwym
- Database user name you created already as explained in Create Databases and Database Users. The default is
x3ds.
- Database user password for 3DSwym
- Database user password.
-
If you are using Oracle, specify the database connection parameters.

Specify the directory containing tnsnames.ora and the
Net service name OR only the full service URL
(//Host[:Port]/service_name)
- The directory of tnsnames.ora
- Specify the tnsnames.ora path. It is usually located in
<Oracle_Home>/network/admin. We recommend that you use
the tnsnames.ora file method for specifying database name
details.
- Net Service Name (with tnsnames.ora) or //Host[:Port]/service_name for 3DSwym Content
-
The default is //localhost:1521/DBSOCIAL.
- Database user name for 3DSwym Content
- Database user name which you created already as explained in Create Databases and Database Users. The default is
x3dswym.
- Database user password for 3DSwym Content
- Database user password.
- Specify the CloudView parameters.
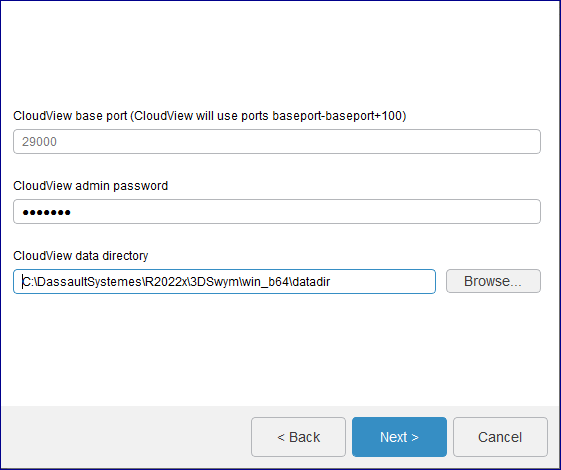
The parameters are:
- the CloudView administrator password: this is the password for the administrator of the CloudView administrator console. The default password is
exalead. - the CloudView data directory for storing CloudView data.
CloudView data will increase based on the total data available on the server. When the amount of data increases, you will be forced to find more space. And increased space on the same machine may affect performance. The best overall solution for volume management is to relegate this to a NAS or SAN infrastructure. This allows you to quickly upgrade the compute hardware without impacting the storage tier.
Click Next.
-
Review your installation choices, then click Install to
install the files.

CloudView is automatically started at the end of the installation.
After a standard installation, as soon as CloudView starts, an initial indexation processes default data. Then, an incremental
indexation, scheduled almost every minute, is launched to index new data and as they are
created.