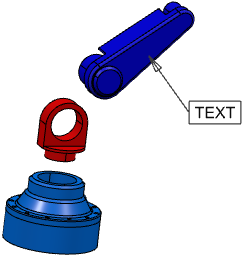
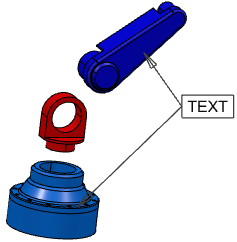
Creating Text Markers | |||||||
|
| ||||||
-
From the Review section of the action bar,
click Text
 .
Note: If the live customization mode is activated, the marker will be created with graphical properties of the last created marker.
 -
Select an object in the 3D area to which
you want to link the marker.
Notes:
- You can select multiple objects before clicking the command to link the marker to all the preselected objects. The marker is created with multiple leaders.
- After clicking the command, you can click in the 3D area to create the marker without any link to any object.
-
Select the text marker type and then the text template to configure the text
marker.
Note: Depending on the marker type associated with the text template, the text template options are available in the text template list. See Text Marker Context Toolbars.
-
Enter the text in the text editor box and click OK
 .
The text marker is created.
-
To change the leader type, select the marker and
click any of the following on the context toolbar:
-
Leader with Arrow

- Leader with Circle

- Leader with None

- Cloud Leader

- Hide Leader

-
Leader with Arrow
-
Optional: To link the marker to a new object,
- Right-click the marker and select Add Leader.
- Select the object in the 3D area.
The marker is linked to the object.
-
Optional: To remove the link with an object, right-click the leader
extremity handle and select Remove Leader.
The link with the object is removed.Notes:
- The default font and the available fonts differ depending on the connector with which you are working and the Live apps that are installed.
- Zooming in excessively on 3D text can result in visual inaccuracies, for example, the leader may be disconnected from the endpoint or the endpoint may be visually distorted.
- You can associate text, label, picture, and stamp markers with zooming, so that whenever you zoom in or zoom out, the markers are also zoomed in or zoomed out accordingly. To associate a marker with zooming, select the Zoomable check box in the Properties dialog box of the marker.
- In the Properties dialog box of a new text marker, you can
modify the Ratio to text size in the
Icon section. You can enter any value ranging from 1 to 10
(the default value is 2). The height of the icon of a text marker equals this ratio
value multiplied by the text size. The icon height and width ratio is always
maintained. If you select multiple text markers:
- If all the text markers have the same font ratio value, it is displayed in the Ratio to text size box. This box is empty if the text markers do not have the same font ratio value.
- If you change the value in the Ratio to text size box, the font ratio property of all the text markers is modified.
- The legacy text markers are upgraded with the new icon ratio property after edition.
- When you switch a geometry to which a marker is linked to no-show space, the marker is not displayed. (Note: In the tree, you must select the Product and not the 3D Shape.) When the marker is set to no-show, switching the linked geometry to show state will not alter the no-show state of the marker.
When the linked geometry is not loaded in the session, the marker is not displayed.
- When you select a marker, its linked objects are highlighted in the 3D area and in the tree.
- The markers linked to an unloaded object are not
displayed in the 3D area. However,
these markers are displayed in the tree with the
 mask. For a marker with multiple leaders, only
the leader linking to the unloaded object is hidden. The marker is hidden only when all of
its linked objects are unloaded.
-
To create a positional link:
- Right-click the text marker, and select Positional link > Create.
- Select an object from the tree.
-
To replace or delete the positional link:
- Right-click the text marker, and select Positional link > Replace.
- Select another object to create a new positional link.
- Right-click the text marker, and select Positional link > Delete.
Note: A positional link allows to ensure that the text box position of the text marker follows the position of the associated object. The leaders may point to their own objects.