-
In the Instructions Authoring section of the action bar,
click Create Data Collect Plan Instruction
 . .
The Textual Instructions panel appears with the created
Data Collect Plan.  -
Click the Data Collect Plan.
The Data Collect Plan Dialog box appears.
-
Select
 Add Computed Data Collect Row.
The Data Collect Row dialog box appears. This has a
section for Formula including a Formula Function
Edit functionality. 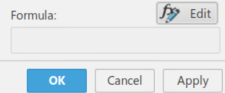 -
Click
 . .
The Formula Editor Dialog box appears for that row.  In the
Objects, this lists the items of the Current, and Previous
Operations. Requirements do not display since the item is selected. -
From the Object section, select an item, Item 623 B (Item
623.1).
The Requirements of the selected item display. 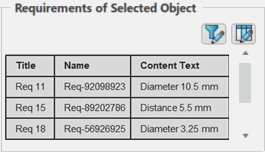 -
Select a Requirement, Req 15
The Requirement is added to the text editor followed by a
..
-
Select a Function, CollectedAverage
The selected Function is added to the text editor followed by a space. Note:
The
Requirement is cleared in the Requirements List while the item
stays select the Items list.
-
Select a Operator, +.
The selected operator is added to the text editor followed by a
space.
-
Select another Requirement, Function, and
Operator.
The selected information is added to the text editor. 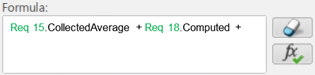 -
Select a Math Function, Absolute().
The Selected function is added to the text editor followed by brackets.
Note:
Cursor remains inside the brackets.
-
Select another Item, Item 328 A (Item 328.1).
The Requirements of the selected item are displayed.
-
Select Requirements, Functions,
Attributes, and
Operators.
The selected information is added to the text editor, inside the brackets. 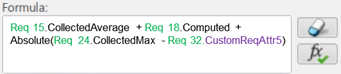 -
Click Edit Row Attributes
 in the Requirements of Selected Object section.
The columns display for Requirements consists of the attributes (default delivered
attributes as well as any customer defined ones). The visibility of these attributes
(columns) you can change. This visibility change is stored in preferences and is used
the next time the panel is opened.
|