-
From the Modules section of the action bar,
click Module Structure Manager
 .
.
-
In the Module Structure Manager dialog box, select one of the
following:
| Option | Description |
|---|
Structure View  |
 |
Links View
 |
 |
-
In the Module name box, specify a name for the module.
-
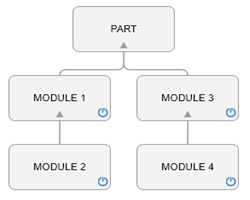
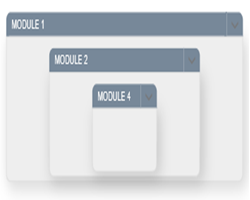
Select a module and click
 to create a sub-module under
the selected module and rename it.
Notes:
- You can add symbolic interfaces, geometrical sets, geometrical features, and
modules to the module.
- The positioning axis manages the positioning of the content of the module. The
first level module has an absolute position and the second level module has a
relative position.
- A module cannot have external links.
-
Click
 in the structural view to
turn on or turn off a module.
-
Click
 to delete a selected module.
-
In the Input section, click
 to add a new input
interface.
-
In the Output section, click
 to add a new output
interface.
-
To manage the positioning feature, double-click the feature. In the
Positioning Moduledialog box do the following:
-
Specify the position values along the X, Y, and Z axes.
-
Specify the rotation values along the U, V, and W axes (the current axes).
-
Expand More and specify the internal parameters.
-
To copy a module with its features, right-click it in the tree, select Copy, and paste it at the required location.
You can also use Power Copy command from the
Tools section of the action bar.
The modules, sub-modules, symbolic interfaces, and features are created.
 .
.


 to create a sub-module under
the selected module and rename it.
Notes:
 in the structural view to
turn on or turn off a module.
 to delete a selected module.
 to add a new input
interface.
 to add a new output
interface.