Creating Limit Contours from an Input File | |||||
|
| ||||
- Plies from zones have been created with the option Create Full Plies and ETBS.
From the Zones Design section of the action bar, click Limit Contours From Input File .
. - Import the file as explained in Import, Export, and Manage External Data, both for the location and the format.
- Select one Relimiting Curve Join Type.
- The limit contour created is a parallel to the
curve you have selected.
Select the type of parallel to create from the list.
- Geodesic and Euclidian impose the type you have selected.
- Geodesic otherwise Euclidian creates a geodesic parallel if possible, otherwise it creates a Euclidian parallel.
- Euclidian otherwise Geodesic creates a Euclidian parallel if possible, otherwise it creates a geodesic parallel.
- Parallel planes otherwise geodesic creates parallel planes if possible, otherwise creates a geodesic parallel.
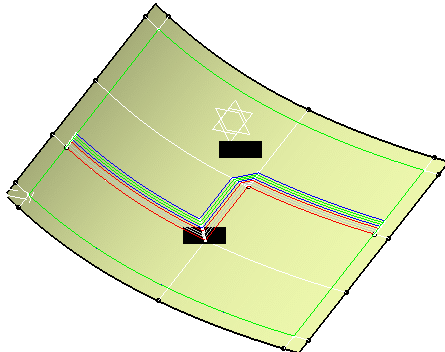
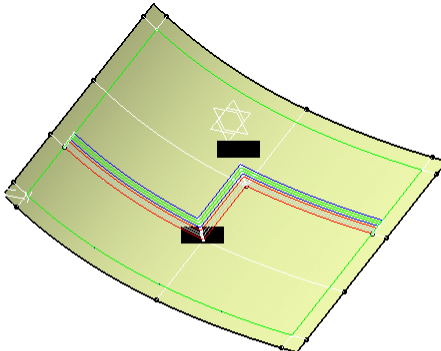
The limit contours and the limit contour group features are created:
- Relimitation by gap filling:
- Relimitation by extrapolation:
| Important: If you add a new column (or a row) to the staggering data file (.xls file), the corresponding first column (row) cell should not be left empty. That is, you should add # to the first column cell or the first row cell. |