-
Click
Human Location
 . .
The status bar stipulates
Ready to select a product/Human Location.
-
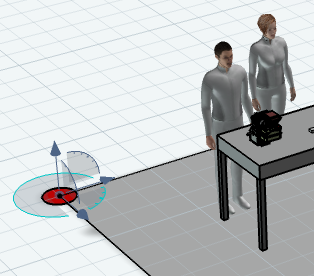
Select the floor in this scenario.
The
Human Location appears at the origin location
of the floor.
-
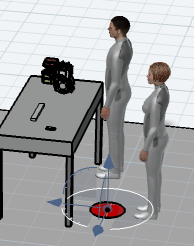
Select the
Robot
on the
Human Location.
Place this in front of the table.
-
In the
Human Location dialog box, use the default name,
HumanLocation1, and the
Radius of
6.89in.
-
Clicking
OK, the human location is saved.
Note:
A human location only becomes visible when you are editing a
human location or creating an activity and looking for a target for the human
location. Others who open a
resource/product do not see any human locations
in the
work area.
-
When clicking
Apply, the human location is saved, then you
can continue creating multiple Human Locations.
Note:
Using apply between each creation to create multiple Human Locations in a single stretch.
|