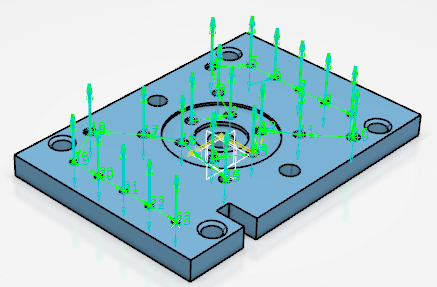
Creating a Drilling Operation
You can create a Drilling, Spot Drilling, Drilling Dwell Delay, Drilling Deep Hole, or Drilling Break Chips operation.
-
From the
Axial Machining section of the action bar,
select Drilling
 ,
then select a position in the manufacturing program.
The Drilling workflow appears in the work area.
-
In the Tool Search dialog box that appears:
- Select the tool type.
- Select the required tool or tool assembly and click one of the following:
Option Description  Select in Session
Select an existing tool or tool assembly from the Resource Configuration View.  Search in Database
Select a tool or a tool assembly from the database.  Look Into Catalog
Browse for a tool or a tool assembly in the catalog. -
Optional: Close the Tool Search dialog box by
pressing Esc. Then, click Search Tool
 to research a
tool in the database.
- Follow the workflow instructions to select hole positions, or select an existing manufacturing pattern from the Manufacturing View.
-
Double-click anywhere in the work area.
A Drilling entity is added to the Manufacturing Program.
The Drilling dialog box appears directly in the Geometry tab
 .
. -
Click
 in the title
bar of the dialog box to edit the name of the manufacturing pattern, such as
Drilling.x.
- Optional:
Click New Feature to apply a machining area
feature.
Note: You can export a feature by clicking Export Feature
 .
. -
In the Mandatory section, verify the mandatory input
parameters.
Note: The following icons are used to describe the status of a parameter:
Icon Description 
Parameter defined. 
Mandatory parameter not defined. 
Optional parameter not defined. 
Parameter not up to date. 
Broken link. - Optional:
Do any of the following:
-
Click
 to remove the
input parameter.
-
Click
 to display
additional information on the parameter in the work area.
-
Click
 to display the
parameter's context menu.
-
Click
- In the Optional section, verify the optional input parameters.
- In the Parameters section, verify additional parameter inputs.
-
Verify the parameters in the following tabs:
 Tool: Select a tool.
 Strategy: Select a Tool path style and
Drilling Mode: Drilling,
Spot Drilling, Drilling Dwell Delay,
Drilling Deep Hole, or Drilling Break
Chips.
 Feeds and Speeds: Specify the feedrates and spindle
speed.
 Macros: Specify transition paths.
-
Click Edit Cycle
 to edit or choose
output syntaxes.
- Click Compute to compute the tool path with the specified parameters.
- Click OK to validate and exit the dialog box.
- Click Cancel to exit the dialog box without saving.
The drilling operation is created as Drilling.x. It is visible in the Activities Process Tree.
