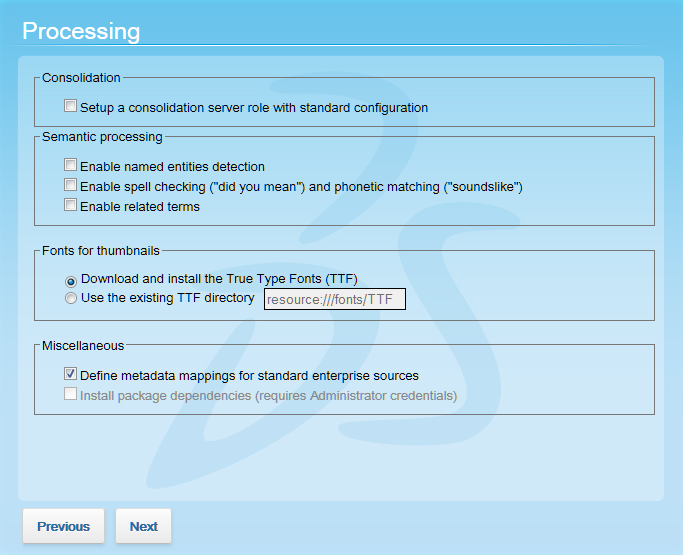
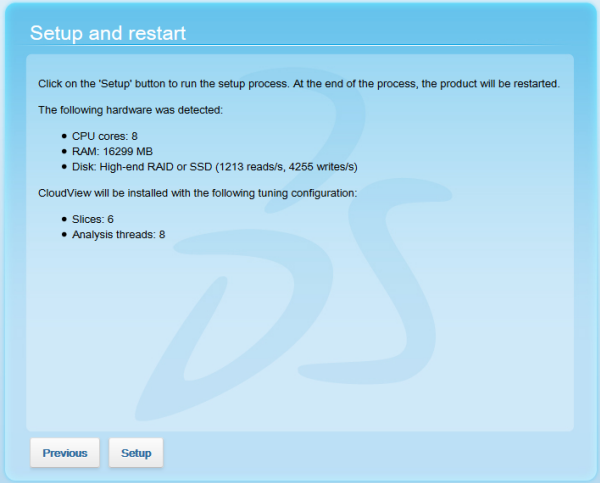
Install Exalead CloudView
To install Exalead CloudView you need the following files:
-
The Exalead CloudView installation kit – download it or copy it from the DVD.
-
A valid license file (
cvlicense.datfor a standalone installation or a.licfile). To request a license, go tohttp://www.3ds.com/terms/software-keys/ -
Any additional Exalead CloudView plug-ins (optional).
|
To do this task |
You need these permissions |
|---|---|
|
Start the Windows command line ( |
Administrator |
|
Install Exalead CloudView |
Administrator, plus:
|
|
Import files during setup |
Read permission for the files to be imported. |