-
In the
3D area,
select one of the following:
- Connection point
- Support section
- Point
A yellow bullet

appears on the selected point.
Note:
If you edit an existing branch, yellow bullets are already displayed
on route elements.
- Click a yellow bullet to select a route element.
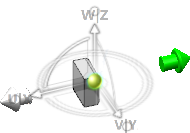
- The
Manual Routing Mode
 is activated.
 - The Robot is snapped to the selected element (a device in our example).
-
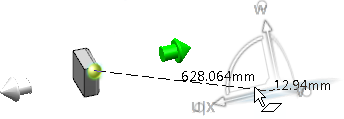
Define the position of the next passing point by clicking one of the two directional arrows:
 : the passing point is placed after the selected route element.
 : the passing point is placed before the selected route element.
- Optional:
Edit the default orientation of the Robot.
For more information, see About the Robot Orientation.
-
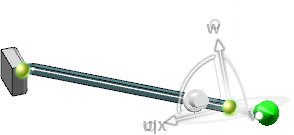
Drag the
Robot to position the passing point.
In the 3D area, a new branch appears.
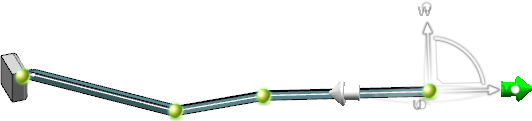
- Repeat the operation until you are satisfied with your design.
Every drop of the
Robot creates a passing point in the
3D area.
-
To cancel your manipulations, press
Escape or close the
Branch Properties panel.
-
To validate your manipulations, click in the 3D area or press
Enter.
The branch route is created.

 .
.
 is activated.