Splitting a Branch at a Branch Point

You can split a branch into two at an existing branch point or at a new branch point. After a split, the electrical link between the two branches is kept.

This scenario describes how to split a branch while editing a branch. The Split Branch command is also available when you edit a branch point.

Important:
  • You cannot split a branch on a branch point positioned on a branch routed through a curve or on a protective covering.
  • When you split a flat cable on a branch point which defines a fold, the fold is automatically removed.


Before you begin:
  • Activate an electrical branch geometry, and then select a branch in the work area.
  • From the Branch section of the action bar, click Immersive Branch Definition .

    The Auto Routing Mode 
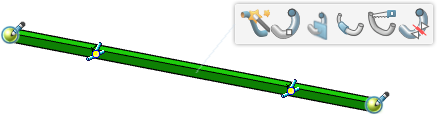
is activated and yellow bullets appear on route elements.

  1. On the context toolbar, click Creation Mode > Split Branch .

    Existing branch points appear under a BranchPoint label.

  2. To split the branch, do one of the following:

    Important: If the Electrical link driven by geometry option is cleared, the Split panel appears to let you define how the electrical link between the two branches is kept:
    • Use same point: after the split, the two branches share the same passing point.
    • Create coincident points: after the split, a passing point is created at each new extremity of the split branches. The two new passing points are coincident.

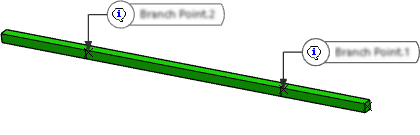
The selected branch is split. Under the Branch Set node in the tree, a new branch appears.

Note: After a split:
  • The tangent continuity between the segments is maintained.
  • The two resulting branches have their own curves and parameters which can be edited separately.
  • You must reroute your conductors.