Calculating a Journey | |||
| |||
-
From the Tools section of the action bar,
click Compute Journey
 .
Note: Journey calculation is displayed in the Temporary Items folder in the tree. Closing and reopening the Journey panel removes existing journey calculations (if any) in this folder.
.
Note: Journey calculation is displayed in the Temporary Items folder in the tree. Closing and reopening the Journey panel removes existing journey calculations (if any) in this folder. -
Either:
- Click
 next to the first box, and then select the start point (point
A) on the map.
next to the first box, and then select the start point (point
A) on the map. - Or, enter an address directly in the box to display a list of suggested addresses.
- Click
-
Click
 next to the
second box, and then select the end point (point B) on the map.
next to the
second box, and then select the end point (point B) on the map.
As for the previous step, you can also enter an address directly in the box.
The two selected locations are identified on the map and the address is displayed. if no address is available, coordinates are displayed instead. When you click a location symbol for an address, the corresponding coordinates are displayed in an additional tooltip. To hide the coordinates tooltip, click the location symbol again.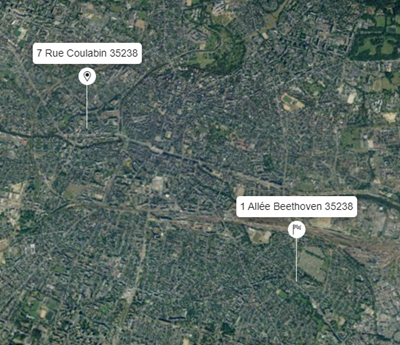
Two new items are also added to the tree view under the Journey node in the Temporary Items folder.
Tip: To keep your journey items when you save the experience, move them from the Temporary Items folder to another permanent location. See Managing Temporary Items. - Optional:
Click
 to
reverse the journey's start and end points.
to
reverse the journey's start and end points.
-
Select the preferred transport mode.
Option Description 
Public transport 
Car 
Bike 
Walk -
Click
 , and then define the appropriate options.
Option Description Routing Dataset Lets you select the routing dataset on which you want to compute journey. Traffic Options Relevant only if you selected
.Select a travel method for your journey: - Fastest calculates a fast journey that might include several transfers.
- Minimum Transfer calculates a journey that might be longer, but with a minimum number of connections.
You can choose between a combination of public transport. To do so, click the appropriate boxes:
- Bus
- Metro
- Train
- Tram
- Funicular
-
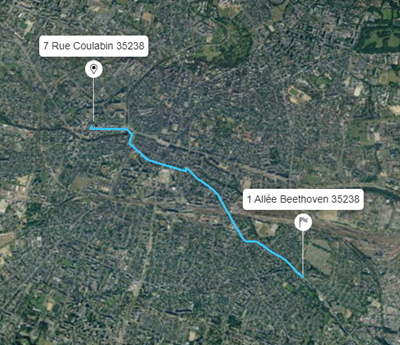
Click Compute.
The corresponding path from point A to point B is calculated with the corresponding transport mode. Journey instruction is also available at the bottom of the Journey panel.

The result is also displayed in the tree under the Journey Result node in the Temporary Items folder.
-
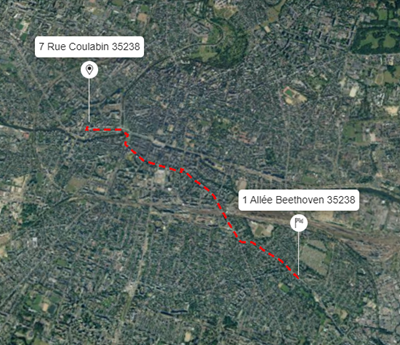
Select another transport mode, and then click Compute.
The path on the map is updated accordingly.Note: Dot patterns indicate a walking path.
- Optional:
Select a journey item in the tree or in the experience, and then modify its
representation attributes in the Properties panel.
-
To exit the command, click Compute Journey
.