About Creating a Geometrical Tolerance | |||||
|
| ||||
Geometrical Tolerance Dialog Box
Availability of each engineering symbol in the various boxes of Geometrical Tolerance dialog box is defined and stored in the Drafting standard xml file, which is embedded in all layouts. However, it is possible to optionally insert any available engineering symbol in any box of a Geometrical Tolerance.
Switching the standard of an existing layout does not change the content of existing geometrical tolerances. However, if the definition of an engineering symbol contained in a geometrical tolerance has been removed, it is displayed using the substitution symbol defined in the standard.
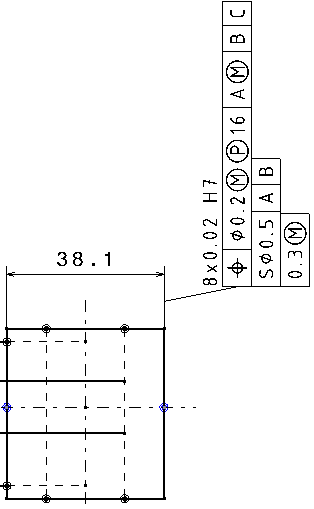
The following Auxiliary Feature Indicators are available:
- Intersection Plane: Identifies a line on an extracted surface or a point on an extracted line. It is placed to the right of the tolerance indicator as its extension.
- Orientation Plane: Identifies the orientation of the tolerance zone. It is placed to the right of the tolerance indicator as its extension.
- Collection Plane: Identifies a closed compound contiguous feature. It is placed to the right of the tolerance indicator after the tolerance frame. It can be parallel to the projection plane in which specification is indicated.
- Direction Feature: Identifies the direction of the width of the tolerance zone. The direction feature is a cone, a cylinder, or a plane constructed from the datum or datum system indicated in the second compartment of the direction feature indicator. The geometry of the direction feature depends on the geometry of the tolerance feature. It is placed to the right of the tolerance indicator as its extension.
| Auxiliary Feature Indicator | Available Engineering Symbols |
|---|---|
| Intersection Plane | Parallelism, perpendicularity, angularity, and symmetry |
| Orientation Plane | Parallelism, perpendicularity, and angularity |
| Collection Plane | Parallelism and perpendicularity |
| Direction Feature | Parallelism, perpendicularity, angularity, and circular runout |
- You can add three indicators for a geometrical tolerance.
- You cannot add two indicators of the same type.
Specify Leader Orientation
You can orient the geometrical tolerance leader perpendicularly to the element to which it is associated (for example, if the leader is associated to a dimension, you can position the leader parallel to the dimension line and orthogonal to the extension line).
For this, you have two different possibilities:
- Select
Me
 > Preferences > App Preferences > 3D Modeling > Mechanical Systems
tab and clear Snap by default (SHIFT
toggles) check box. To orient
directly the geometrical tolerance leader perpendicularly to the associated
element, press Shift before clicking in the drawing
to position the tolerance .
> Preferences > App Preferences > 3D Modeling > Mechanical Systems
tab and clear Snap by default (SHIFT
toggles) check box. To orient
directly the geometrical tolerance leader perpendicularly to the associated
element, press Shift before clicking in the drawing
to position the tolerance . - Go to
Me
> Preferences > App Preferences > 3D Modeling > Mechanical Systems
tab, under
Annotation Creation, and select Geometrical tolerance check box . The leader is oriented perpendicularly
to the geometry by default. In this case, pressing Shift
will let you orient it differently.
Specify Geometrical Tolerance Orientation
To make the tolerance vertical, hold Alt before clicking in the drawing to position the tolerance.