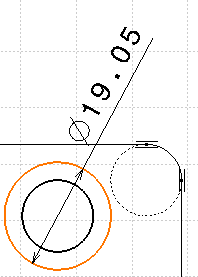
- From the Annotation section of the action bar, click Dimensions
 . . - Click a first element in the view. For example, a circle.
-
If required, click a second element in the view. The dimension type is
automatically defined according to the selected elements (Projected
dimension
 or
Force dimension on element or
Force dimension on element
 in the
Tools Palette). in the
Tools Palette).

At this step, the options in the Tools Palette let you
to position the dimension using one of the following modes:
Projected or Forced
modes.

These options are also available in the context menu.
- Click Force Dimension on element
 from the Tools Palette. from the Tools Palette. - Right-click to access the context menu and select 1 symbol.
The dimension becomes a one-symbol dimension.
- Click in the drawing window to validate the dimension creation.
- Create two other dimensions on a line as shown.
- Select the two dimensions by pressing Ctrl (you can move
them both).
- Start creating another dimension: click Dimensions
 and select another circle.
 - Click in the drawing to validate the dimension creation.
-
Right-click the dimension you created, and choose Dimension.3
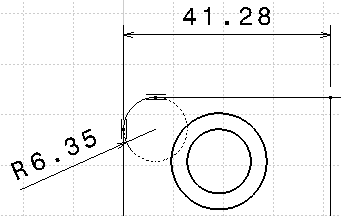
Object and select Swap to Radius.
The diameter dimension has swapped to the radius dimension. 
- Right-click the dimension again, and choose
Dimension.3 Object, and clear
Extend to Center.
The radius extension line is not extended up to the center anymore.
|