Creating and Applying a Material | ||
| ||
-
From the Live
Rendering section of the action bar, click Create and Apply
Material
 .
.
- In the Create Material dialog box, indicate the new material name, or leave the default.
- Select the material type, either Core, or Covering.
- Optional: Change the material family.
-
From the list, select a material template, and then click
OK.
Important: - You cannot customize these templates.
- By default, 3DS PBR 2021x is selected.
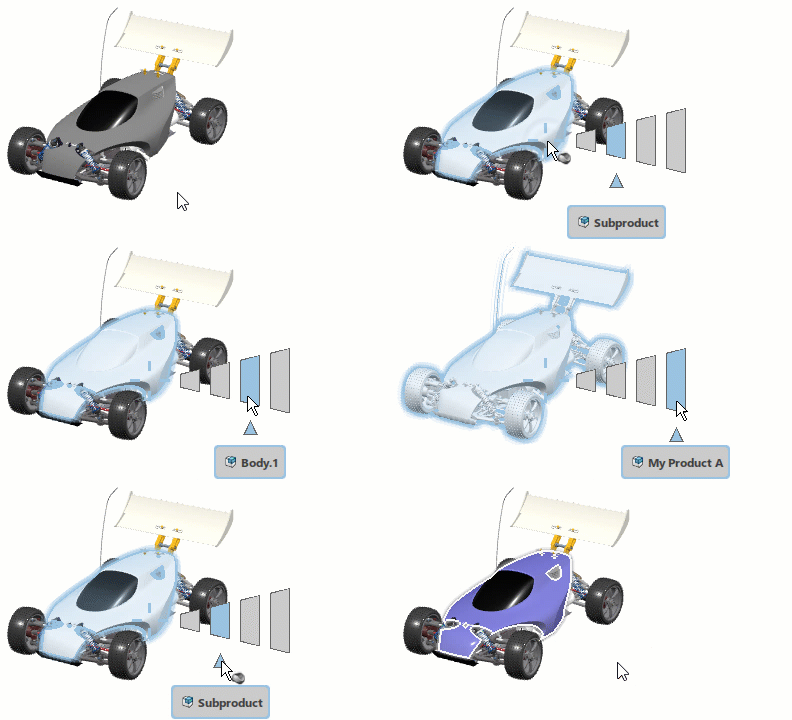
- In the tree or work area, select the object onto which you want to apply the material.
-
On the material selector, move your mouse over the bar of the level you want to apply the material to, and then click the marker below the bar to apply the material and quit the command.
The leftmost bar corresponds to the most profound element in the structure. When a material is already applied onto a structure element, a green marker is displayed. For more information on the material selector, see Material Definition User's Guide: Material References: Applying Materials: Using the Selector to Apply Materials.

Important: - You cannot create material vectors, or create layers of a material.
- You cannot filter subelements through the User Selection Filter commands.
Note: To use the former context toolbar to apply your materials, clear Force simplified interface for material application in the Live Rendering Preferences, and select Legacy in the Interface list in Me > Preferences > App Preferences > Simulation
> Physics Simulation > Material Definition > Interface .
 -
To access the Appearance Domain
dialog box and edit the material appearance, do one of the following:
- In the tree, expand the
Materials node, and then double-click the material
appearance
 .
. - In the tree, right-click
 and then select xxx object >
Definition....
 - From the top bar, enter your search criteria for the material in the
Search box, and then click
 .
In the Material Browser, click
  next to the material to display the context menu, and then click Appearance.
Any changes you make in this dialog box impacts the material appearance but also the visual aspect of all the applied materials referring to this material appearance.
The dialog box contains different areas that you can expand and collapse.
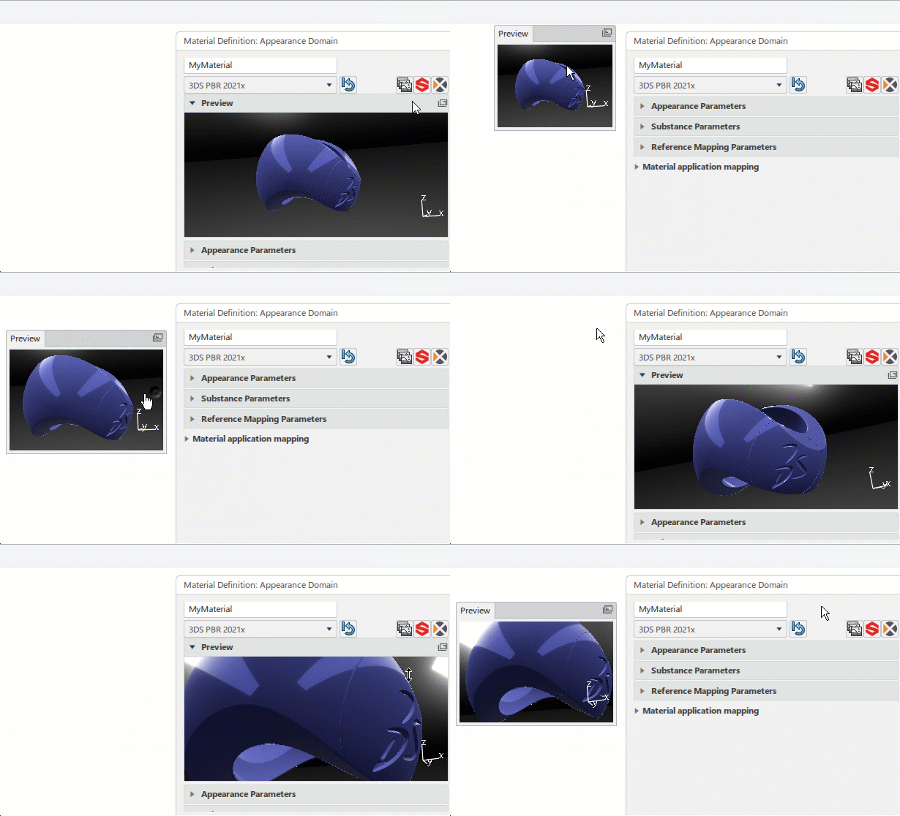
Area Description Preview Displays a preview of the material using a predefined shape, a default UV mapping, and a default black ambience. You can perform some viewing operations (pan, rotate, or zoom) and detach or attach the preview from the main dialog box. To do so, click:
 to detach the preview from the
Appearance Domain. You can
move, resize, or dock the window to one of the
four docking areas like any immersive panel.
 If you resize the window, the new dimensions are stored in the local preferences and applied next time you detach the window.
 to attach the preview to the
Appearance Domain dialog
box.

Appearance Parameters Contains a series of tabs that group parameters in a logical way. Tip: Double-click a tab to keep its parameters visible in the area. This lets you display the contents of several tabs at the same time. Substance Parameters Dedicated to material with Adobe substances. Reference Mapping Parameters Contains the mapping parameters for the material reference (that is, the material appearance). This mapping impacts all the material applications. Material application mapping Contains the mapping parameters for the applied material. This mapping is a local modification of the material appearance. - In the tree, expand the
Materials node, and then double-click the material
appearance
-
Edit the parameters as required.
The real-time visualization updates to reflect the changes.