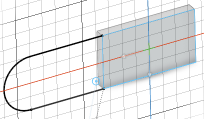
Drawing Lines, Arcs and Points

You can draw simple geometry such as lines, arcs and points on existing faces or separate from existing geometry. The user interface features a pop-up panel that helps you choose between multiple desired geometries to be created. The choices are: Draw on Grid, Draw in 3D, Open Profile, Closed Profile, Line, Arc, Spline, and Point. Faces are automatically created when lines and arcs are in the same plane and form closed profiles.

See Also
Basic Concepts: Industrial Context
About the Support Plane
About Snap Features
  1. From the Shapes section of the action bar, click Draw .
  2. In the context toolbar, click Draw on Grid or Draw in 3D.

    Notes:
    • Draw on Grid is the default option because drawings are created primarily on a single plane or planar face.
    • You can toggle between these two options at any time while you are drawing.

  3. Click Open Profile .
  4. Do one of the following:
    • To create a line,

      By default, Line is selected in the context toolbar; this allows you to draw straight lines.

      1. Click to define the start point of your line.
      2. Move the pointer to the endpoint of the line you want to draw and click when the displayed length is correct.

        Angle values and lengths are shown.

      3. Continue to add whatever lines, arcs and spline curves are needed to finish your drawing.
      4. When done, double-click or press Esc.

    • To create a tangent arc,
      1. Click Arc.
      2. Click Tangent Arc .
      3. Click to position the start point of your arc.
      4. Move the pointer to the end point of the arc and click.

      5. If required, press Shift to reverse the arc orientation.
    • To create a three-point arc,
      1. Click Arc.
      2. Click Three-Point Arc .
      3. Click to position the start-point of your arc.
      4. Move the pointer and click to specify the midpoint.
      5. Move the pointer to the end-point of the arc and click.

    • To create points,
      1. Click Point .
      2. Click to add points.
      3. To finish, double-click to create a last point or press Esc.

    Tips:
    • Click and drag to switch between open profile draw tools.
    • Before validating, press Spacebar and use handles to make on-the-fly changes or specify precise dimensions in the callouts that appear. Values entered are locked automatically.
    • Use the edges of existing 2D and 3D shapes to close a profile and create a planar face.

    • To use combine commands (Add, Subtract, Intersect and No Operation) while you create geometry and simple shapes, select Display Combine Commands in Me > Preferences > Natural Shape > Display > Drawing. Commands appear in the context toolbar.

Use the side panel to:

  • determine if the drawing is to be inserted in an existing or in a new geometry.
  • determine if you want to create a coincidence constraint automatically when the extremity of a wire coincides with an existing wire.