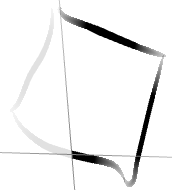
Tracing

You can create vector curves.

  1. From the Traces section of the action bar, tap Trace.
    Options are available in the Graphic Properties frame at the right of the screen.
  2. Optional: Set your Trace options as desired.
    OptionDescription
    Opacity (%) Drag the slider or edit the value to define the opacity of the curve (as a percentage).
    Thickness (mm) Drag the slider or edit the value to define the curve thickness.
    Note: You can set your trace options at any time while tracing.
  3. Start tracing.
    The curve is turned into a vector curve when you lift the pen or release the pointer.

  4. Set the radius to define the picking area.
    For more information, see Selection Type.
  5. Shift + move the drawing plane.
    The plane depth is modified. It lets you draw on different depths.
    Tip: The Shift capability is available when you draw on planar supports.

  6. Press Ctrl and start tracing again.
    The last created curve is extended.

Note: The number of points is automatically computed. You can right-tap the curve and modify the precision, using either the slider or entering a value in the Precision box. The higher the number of points, the higher the precision.

You can also locally activate or deactivate the auto-match by tapping , whatever the option set in Natural Sketch: General.