Creating Pads along a Reference Direction

You can create a pad along a specified reference direction which is not normal to the selected profile.


Before you begin:

Make sure that the Open dialog boxes with legacy appearance check box available at Me > Preferences > App Preferences > 3D Modeling > 3D Modeling Core > Part Design > Appearance of dialog boxes, is selected.

See Also
Creating Pads
Location of Sketches in the Tree (Hybrid Design)
  1. Select the profile you want to extrude.


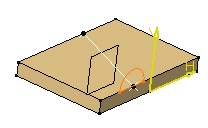
  2. From the Model section of the action bar, click Pad .
    The Pad Definition dialog box appears and the app previews the pad to be created.


  3. Set the Up to plane option and select yz plane. For more about this type of creation, see Creating Pads Using Limiting Plane.
  4. Click More>> for more information.
  5. Clear the Normal to profile check box.
    Note: The option to select the direction which is not normal to the profile is only available in the MDG license. In the restricted GDE license, a pad will be created with the default Normal to Profile option.
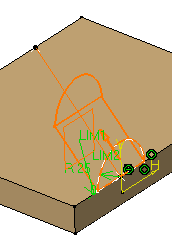
  6. In the Reference box, select the line to use it as a reference.

    The app previews the pad with the new creation direction.


  7. Click OK to confirm the creation.

    The pad is created. The node (identified as Pad.x) is added to the tree.